Monthly Archives: May 2010

Shopping Guides

I just came across this detergent shopping guide from Organic Consumers and it's so important that I knew I had to pass it along.  It has a list of all of the soaps/detergents that use 1,4 dioxane, a known carcinogen that can cause a host of health problems.

This seemed like a good opportunity to pass along a couple of other good resources that are available online.

The Environmental Working Group Shopper's Guide to Pesticides

The Environmental Working Group Safety Guide to Children's Personal Care Products

The Environmental Working Group Shopper's Guide to Safer Sunscreen

The Food and Water Watch rBGH-free Dairy Guide (search by state)

The Non-GMO Shopping Guide

Crockpot Snack Mix

I recently made a batch of Christine's Crockpot Granola.  I really like making it as it's very easy and it tastes great.  While my overnight crockpot cereal is a huge hit you can only make enough for a couple of days.  With the granola I can make enough for a week or more (depending on how fast we eat it).  I posted the fact that I was making a batch of granola on FaceBook and got a comment from Sandy who didn't know that you could make that in a crockpot.  Well folks, yes you can.  You can actually make a lot of things in a crockpot, one of the reasons I love mine so much.

My crockpot history

I own two.  A small 2 quart and a larger 5 quart.  I've considered getting a 6 quart but have no idea where I would store it in my rather small kitchen.  First things first, let's clear up the terminology.  A crockpot is the same thing as a slow cooker.  Crockpot is simply a brand name from the Rival Corporation.  Slow cooker is what everyone else calls it because crockpot is trademarked.  I call mine a crockpot because I happen to own a Rival brand and that's what I've been calling it for 30 years.

I got my first crockpot, which is my 5 quart when I was in college  (and yes, I'm still using it all these years later, that sucker works like a charm).  I went to a college where you needed to feed yourself on the weekends because the kitchen closed down. After a couple of weeks as a freshman I called my Mom and told her that I needed a hotpot and would she please buy me one.  She asked me what I wanted it for.  I said to make soup, sauces and things like that.  I came home a few weeks later and there was a crockpot sitting on my bed.  I was, needless to say, thrilled.  She asked if that was what I wanted.  I replied that I had been looking for a hotpot which cost about $6.  She offered to return the crockpot and buy me a hotpot (better deal for her). I hugged the box to my chest and announced that I would definitely be able to use this.  And indeed I did.  For four years I was very popular on the weekend as several of us would pool our food and make soups or a huge pot of spaghetti sauce and eat together.  It was great.

After I got married I learned that a crockpot is a lifesaver when you have two working professionals. You come home and dinner is ready.  It became one of our most used kitchen appliances.  Then we started having kids and it became even more important to plan meals that would be simple, easy and fit into our increasingly busy schedule. Now we're empty nesters but our crockpots still get used regularly and are one of my favorite time saving tools. 

Dry cooking in a crockpot

Dry cooking in a crockpot can be tricky. That's because the point of a crockpot is to seal in moisture. This reduces the amount of moisture you need to cook with and creates a slow braising effect. You need to adjust for dry/low moisture recipes; one trick is to leave a wooden spoon in the crock propping the lid open.  You also need to make things that won't burn or stick.  Snack mixes are a good choice.  You get a tasty, crunchy treat where you control the salt, sugar, fat and flavor content without all of the chemicals, preservatives and artificial colors of store bought snack mixes.  Although I use cereals as the base for these mixes I tend to buy only cereals that do not have any objectionable ingredients.  I also use raw or soaked nuts and add sea salt as needed for flavor.  I prefer not to use roasted nuts because they are not as healthy for you.

Here are our favorites:

Crockpot Tropical Snack Mix
Print
Ingredients
  1. 3 C. rice squares cereal
  2. 2 C. oat squares cereal (look for gluten free)
  3. 1 C. dried banana chips, unsulfured
  4. 1 C. dried pineapple, unsulfured
  5. 1 C. macadamia nuts, raw and unsalted
  6. 1 C. shredded coconut, unsulfured and unsweeteend
  7. 1/2 C. coconut oil, organic, melted
  8. 1 T. honey, raw and local preferred
  9. 1 t. cinnamon
  10. 1 T. sucanat
  11. 1/2 t. sea salt
Instructions
  1. Mix all ingredients into the crockpot
  2. Turn it on low for 3-4 hours, propping the lid open with a wooden spoon
  3. Stir every 30-40 minutes
  4. When it is done (the mixture seems very dry), turn off the crockpot, uncover and let the mixture cool completely in the crockpot
  5. Store in an airtight container
The Ingredient Guru, Mira Dessy https://theingredientguru.com/
Crockpot Tex Mex Snack Mix
Print
Ingredients
  1. 3 C. corn squares (organic and low sugar)
  2. 2 C. rice squares
  3. 2 C. corn chips (organic)
  4. 1 C. pecans or walnuts, raw
  5. 1 stick melted butter (organic)
  6. 1/2 t. hot sauce
  7. 1 T. Penzey's Taco seasoning
Instructions
  1. Mix all ingredients into the crockpot
  2. Turn on low for 3-4 hours, propping the lid open with a wooden spoon
  3. Stir every 30-40 minutes
  4. When done (the mixture seems dry), turn off, uncover, and let cool completely in the crockpot
  5. Store in an airtight container.
The Ingredient Guru, Mira Dessy https://theingredientguru.com/
Crockpot Asian Snack Mix
Print
Ingredients
  1. 4 cups rice squares cereal
  2. 1½ cups sesame crackers
  3. 1 C. cashews
  4. 1 C. dried peas with no artificial color (these are hard to find)
  5. 1 stick melted organic unsalted butter
  6. 1 T. Tamari sauce
  7. 1 t. Chinese five spice
  8. 1/2 t. sea salt
Instructions
  1. Mix all ingredients into the crockpot
  2. Turn it on low for 3-4 hours, propping the lid open with a wooden spoon
  3. Stir every 30-40 minutes
  4. When it is done (the mix seems dry) turn off the crockpot, uncover and let the mix cool completely in the crockpot
  5. Store in an airtight container
The Ingredient Guru, Mira Dessy https://theingredientguru.com/
Crockpot Curried Snack Mix
Print
Ingredients
  1. 4 C. rice squares cereal
  2. 1 C. cashews, raw and unsalted
  3. 1/2 C. chopped walnuts, raw and unsalted
  4. 1/4 C. candied ginger, diced finely
  5. 1 C. shredded coconut, unsulfured and unsweetened
  6. 1 t. curry powder
  7. 1/2 C. ghee
  8. 2 t. Tamari sauce
  9. 1/2 t. sea salt
Instructions
  1. Mix all ingredients into the crockpot
  2. Turn it on low for 3-4 hours, propping the lid open with a wooden spoon
  3. Stir every 30-40 minutes
  4. When it is done (the mix seems dry) turn off the crockpot, uncover and let the mix cool completely in the crockpot
  5. Store in an airtight container
The Ingredient Guru, Mira Dessy https://theingredientguru.com/
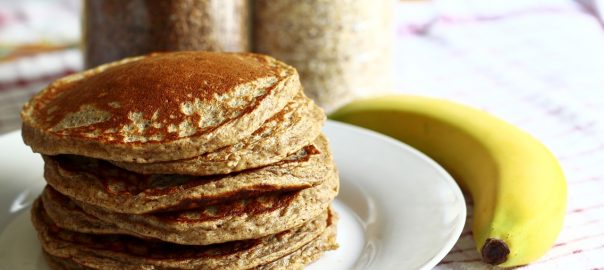
banana oat pancakes

Banana Oat Pancakes

Do you love pancakes?

We love pancakes in our house.  They are a great, easy to make, healthy, whole-grain breakfast.  Throw in some fresh fruit and maybe a little homemade Greek yogurt and it's the perfect meal to start your day…filling, nutritious, blood-sugar balancing, and, most importantly, delicious.  Of course, pancakes are also delicious at any time [breakfast for dinner anyone?].

Using whole grains

I love it when I find a recipe that is so perfect it doesn't need anything else.  This recipe is one of them.  From my King Arthur Flour Whole Grain Baking book, it's a recipe that is a consistent favorite.  I love the fact that it's made from whole grains.  Although I make my own oat flour by grinding oat groats you can easily make it at home by placing old fashioned oats in the food processor or blender and blending it until it reaches a fine consistency.  If that's more than you are willing to do you can also just buy it, both Arrowhead Mills and Bob's Red Mill sell oat flour or you can get certified gluten-free oat flour from Legacy Valley or Cream Hill Estates.

As a quick side note, because oats tend to be grown near, stored with or transported with other glutinous grains, most specifically wheat, if you're following a gluten-free diet you'll need to make sure you're getting certified gluten-free oats.  Certified producers grow and process only oats, guaranteeing that there is no cross-contamination.

This recipe is simple and delicious. One of the things that my family likes so much about it is that the pancakes are very fluffy.  You don't realize that these are whole grain oat pancakes they are that light and airy.  The bananas combined with the cinnamon and nutmeg make it a delicious way to start your day.  I also like having another great recipe that allows me to use up any almost over-ripe bananas.

King Arthur Flour's Banana-Oat Pancakes
Print
Ingredients
  1. 3 small bananas mashed
  2. 2 T. unsalted butter melted (use organic)
  3. 1 T. lemon juice
  4. 1 T. sugar (I reduce this to 1 t. as the bananas when they are this ripe have a lot of natural sugars)
  5. 2 eggs
  6. 1 C. oat flour
  7. 1/2 t. baking soda
  8. 1/2 t. salt
  9. 1/2 t. ground cinnamon
  10. 1/2 t. ground nutmeg
Instructions
  1. Stir together the mashed bananas, butter, lemon juice and sugar in a medium bowl.
  2. Beat in the eggs.
  3. Whisk together the oat flour, baking soda, salt and spices in a small bowl.
  4. Form a well in the center of the dry ingredients and pour in the wet ingredients.
  5. Stir the batter just until the dry ingredients are thoroughly moistened.
  6. Check to be sure the batter is thin enough for your pancakes; you may need to add a touch of milk or water (I never do)
  7. Let the batter sit 10 minutes before using.
  8. Heat a nonstick griddle or heavy skillet.
  9. If your surface is not non-stick brush it lightly with vegetable oil.
  10. When the surface is ready spoon batter 1/4 C. at a time into the pan.
  11. Let the pancakes cook on the first side until bubbles begin to for around the edges, 3-4 minutes.
  12. When the pancakes are just beginning to set flip then and let them cook on the second side, about 1 1/2 minutes more.
  13. You can sprinkle toasted walnuts over the batter just before cooking as an extra treat.
The Ingredient Guru, Mira Dessy https://theingredientguru.com/


watermelon for agua fresca

Quench Your Thirst With Agua Fresca

Agua fresca is Spanish for fresh waters. It's a refreshing non-alcoholic summer-y drink with origins in Mexico where it is sold by street vendors.  In South and Central American stores or restaurants you can sometimes you can find it in large containers where it is ladled out by the glassful.  Agua fresca is a great drink for warm weather. It's a hydrating and satisfying thirst quencher that is much better than soda or over-sugared bottled drinks and fountain drinks.

Agua fresca is usually made with fruit, lime juice, and water.  Watermelon, cantaloupe, strawberry, and pineapple are popular flavors.  When you make them at home the ingredients can be adjusted for personal taste.  Often there's no need to add sugar, because the fruits are sweet enough on their own.  Because you don't strain the agua fresca after blending it (unless it's too thick in which case you can lightly strain to remove larger pieces) you're also getting some of the healthy fiber.

What fruits to use

Just about any fruit or fruit combination is fair game when it comes to agua fresca. Of course you'll need water and lime juice.  Substitute lemon if you're out of limes, but trust me it's somehow better with lime juice.  Mangos, peaches, pineapple, there's really no limit to the tasty and refreshing combinations you can make.

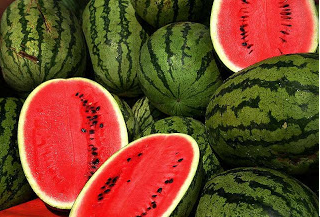
One of my personal choices for a great agua fresca is watermelon which is abundantly available in the summertime. Juicy and delicious, watermelon is in vitamin C  and lycopene, as well as being rich in the electrolytes potassium  and sodium.  This makes it a fabulous choice for summer time when we tend to lose a lot of electrolytes through perspiration.  

Luciano Pavarotti once said, “Watermelon, it's a great fruit. You eat, you drink, you wash your face.”  If you're eating it that's certainly true.  With an agua fresca you can still enjoy the wonderful flavor and not have to worry about the wash your face part.  Here's my favorite recipe:


Agua Fresca
Print
Ingredients
  1. 2 C. strawberries, dehulled
  2. 3 C. watermelon, removed from the rind and pitted
  3. juice of 1/2 a lime
  4. 1/3-1/2 C. of ice cold water
  5. mint leaves for garnish
Instructions
  1. Place berries, watermelon and lime juice in a blender
  2. Blend until well mixed
  3. Add water until you reach a consistency that you prefer
  4. Garnish and enjoy!
The Ingredient Guru, Mira Dessy https://theingredientguru.com/

Making Homemade Jam

Josh wrote in and wondered, “We just made some strawberry jam. Best jelly I've ever had. Do you know if you have to use such a huge amount of sugar? The basic recipe we used was adamant not to adjust or the jam would not set properly.”


Strawberries are very low in pectin so you do need to add a fair amount of sugar to get them to set. If you use less sugar they will not set. You can try using some strawberries that are not fully ripe and still have the white tips but I have had hit-or-miss success with this method.


One way to vary the amount of sugar, especially if you are not using pectin, is to mix the strawberries with a higher pectin fruit such as apples, blackberries, crab apples, cranberries, gooseberries, grapes, or citrus peel.  This works for any low pectin fruit such as apricots, blueberries, peaches, pears, rhubarb, and raspberries.


If you are willing to use pectin you can use a commercial variety, and there are some low sugar ones out there, but another option is to make your own homemade pectin using apples or lemons. There are excellent directions in the book “Preserving Memories” by Judy Glattstein (who I confess is my mother and an excellent canner).


There are recipes that talk about using honey or other sweeteners but I find that most of them call for gelatin which I prefer not to use.

Aromatherapy Field Trip

Steve and I recently took a trip into Houston.  We were headed for the Museum of Natural Science but would up making a little detour before visiting the museum.  Across the street from the Museum, located at One Hermann Street, is a garden that is open to the public.  One part of the garden is an Aromatic Garden.  Filled with raised beds of mints, culinary herbs, rosemary and other aromatics it is truly a delight for the senses.


We wandered through the beds delighting in the plantings and stroking the different plants to release their scents, admiring how many different kinds of mints and basils and thymes, and more there are.  The smell, the texture, the setting all combined to make a very relaxing and delightful stroll.  I confess that my hands smelled quite delicious by the time we were done.


Next door to the Aromatic Garden is the Rose Garden.  Abounding with blooms of all sizes and colors we wandered from bed to bed exclaiming over the different colors and scents.  Some of the showiest roses had no scent at all while some were so overpoweringly perfume-y that one small sniff was more than enough.  


I could feel my blood pressure dropping and a sense of calm envelop me as we enjoyed both of these gardens.  It was a moment of mindful meditation.  Even now, thinking about them as I write I find a peaceful feeling rising forth.  Such is the power of scent and beauty that it can help us to slow down and enjoy the moment.  Not for nothing do we have the phrase “take time to smell the roses.”


While I have aromatic herbs in my garden I'm now considering adding some roses to I can recreate a small dose of the experience we had this morning for those days when I can't get all the way into the city.  If you have a small corner of your garden available you might want to consider doing the same.


photo courtesy of Stan Shebs | Wikimedia Commons

Grinding Flour

Claire wrote in and asked, “I have a question re: grinding your own flours out of grains, say brown rice flour, garbanzo bean flour, etc. When you do it, do you soak the grains/beans before you grind it? I soak everything over night (my grains, beans and nuts) before I cook it. I learned this from my Natural Chef class as soaking deactivates the phytic acid that acts as enzyme inhibitors and makes it more digestable. Cooking alone helps to some extent, but not as good as soaking. I am just wondering if I do soak it first, do I need an extra step, say, using a dehydrator to dry it before I grind it.

The reason I'd like to get the model Super 5200 from Vitamix, is that in addition to a wet container that's good for processing wet goods, there is an additional dry container that has a special set of blades that are designed for grinding flours. Then it follows that do I need to also get a dehydrator before I can even grind it?”


I'll start by saying that yes there is another container that can grind grains and beans into flours.  I use a Wondermill which does a great job and can grind to several different levels of fineness.  You cannot grind wet or oily items (flax seeds, wet sprouts, nuts, etc.) in the electric version.


As far as soaking goes there are a few different ways to do it.  The first is to soak, dry (either in a dehydrator or in an oven set to very low temp for a long time) and then grind.  Another is to sprout, dry and then grind.  The picture above shows flour made from sprouted wheat and sprouted spelt; you can see that the texture is no different than if you use the whole grain.  The third is to grind your grains into flour and then soak the flour overnight before using it, this is the method that I use most.  Any of these methods will work well, it's up to you to determine if you want to use the oven method or purchase a dehydrator.


Using fresh ground flour is an excellent idea because many nutrients are stripped out by commercial processing.  Additionally, if you use fresh ground flour you are getting the full benefit of the germ, which is where all of the beneficial oils are.  It is important to note that using fresh ground flour may require a modification to your recipe because the extra fiber can retard the rise of gluten (requiring a longer rise time or the addition of leavening agents such as vital wheat gluten, lecithin, ascorbic acid or others) and the moisture content may change as the fiber soaks up more liquid.


There are several excellent books that deal with whole grain flours:


Thanks for your question, I hope this helps.

photo courtesy of Jaaq | Wikimedia Commons