Category Archives: baking


Holiday Recipe: Olive Oil Cranberry Bundt Cake

I love the occasional tartness of cranberries! And every year I look forward to the fresh ones available in the grocery store. 

You might hesitate to try it because of the olive oil, but I assure you that this tastes mellow and not greasy. I received many positive feedback about this recipe and I am so delighted to share it this holiday.

Tinkering with the recipe over the years, this is the final version that I came up with. Enjoy my healthy holiday treat!

Olive Oil Cranberry Bundt Cake

This moist and not too sweet bundt cake is filled with tart cranberries in every bite.

Ingredients
  

  • 6 egg whites
  • 1 1/2 cups evaporated cane juice crystals
  • 3/4 cup *extra virgin cold-pressed olive oil (see note for the link)
  • 2 cups “GF flour blend (such as King Arthur)
  • 1 teaspoon baking soda
  • 1 teaspoon salt
  • 1 teaspoon ground cinnamon
  • 1/2 teaspoon ground nutmeg
  • 1 cup buttermilk, organic

    If you do not have buttermilk you can make it by combining 1 cup organic whole milk with 1 tablespoon apple cider vinegar and let it sit for 5 minutes to curdle

  • 2 cups chopped fresh cranberries
  • 2 tablespoons orange zest
  • If desired make a simple orange juice glaze: 1 cup evaporated cane juice crystals 1/4 cup orange juice

Instructions
 

  • Preheat oven to 350 degrees F
  • Butter a 9-inch bundt pan and dust with flour; in a bowl, beat the egg whites until stiff
  • Beat in the cane juice crystals until fluffy. Whisk together with orange juice to make the orange glaze.
  • Mix in the olive oil in a separate bowl, mix the flour, baking soda, salt, cinnamon, and nutmeg
  • Alternately mix the egg white mixture and the buttermilk into the flour mixture until smooth
  • Fold in the cranberries and orange zest
  • Transfer the mixture to the prepared Bundt pan
  • Bake 1 hour in the preheated oven, until a knife inserted in the cake comes out clean

Start Your Healthy Holiday Plan!


For more healthy holiday/leftover recipes, be sure to get your copy of my Healthy Holiday Recipes and Holiday Leftover Plan ebooks! 

Have a wonderful holiday season!

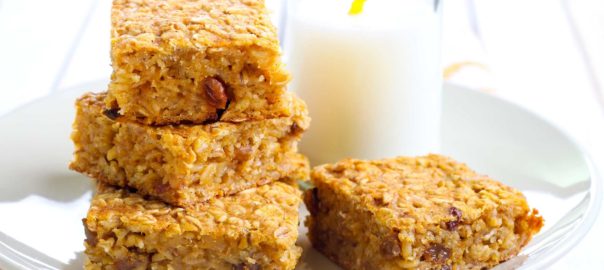
Pumpkin Oat Breakfast Bars

My friend Erin recently shared this delicious recipe for a great on-the-go-snack bar. With pumpkins in season, it's easy enough to make your own puree. If you don't have the time or inclination to make your own, the canned stuff works just fine. A couple of words of caution, however, when choosing canned pumpkin:

  • It's best to use a brand that has a BPA free lining
  • Organic pumpkin is preferred
  • I highly recommend that you read the label and make sure that you are getting only 100% pumpkin. You don't need all those other ingredients.

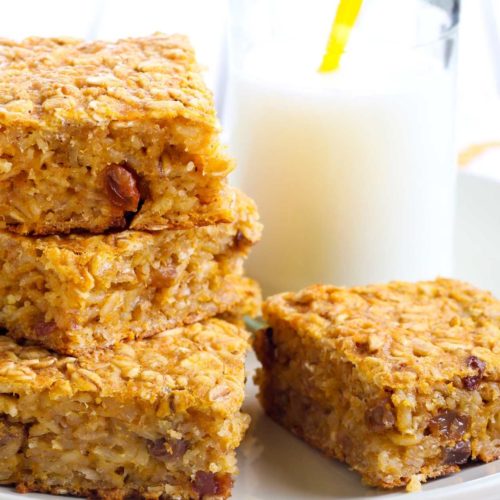
These breakfast bars are fabulous for a quick breakfast, perfectly portable if you need to have breakfast on-the-go. And so tasty that they also make a great snack. If you'd like, add a serving of protein powder to make your bars even more nutritious. If you do add the protein powder you may find that you need just a Tablespoon or two of water so the mix isn't too dry.

Pumpkin Oat Breakfast Bars

Ingredients
  

  • 3/4 cup pumpkin purée
  • 2 eggs
  • 1/4 cup organic butter or ghee at room temperature
  • 1 large or 2 small ripe bananas
  • 1/4 cup honey
  • 2 cups rolled oats (not the quick cook variety)
  • 1/2 cup pecans, chopped (you can also use walnuts or sunflower seeds)
  • 2 Tbsp shredded coconut, unsweetened
  • 1/4 cup oat bran (optional)
  • 1/2 tsp cinnamon, ground
  • pinch of Celtic sea salt
  • 1 Tbsp grated orange rind
  • 1/4 cup dried currants
  • 1/4 cup dried blueberries

Instructions
 

  • Measure out the 2 cups of oats and pour just enough warm water over them to cover them
    Soak for about 5 minutes while you’re mixing up the wet ingredients
    In a mixing bowl, stir together the pumpkin, eggs, butter or ghee, honey, and banana
    You may want to mash the banana before adding to the bowl if it's not really soft
    Before adding the oats, drain them well
  • Add the oats, nuts, coconut, oat bran, cinnamon, salt, orange rind, currants, and blueberries, and stir until ingredients are well combined (this step is where you would also add the protein powder, if using)
    Spread mixture into a lightly greased (butter, ghee or coconut oil) pan so the batter is no more than an inch or two deep. An 8” x 10” baking dish works well
    Bake in a 350 degree F. oven for 40-50 minutes, or until golden brown
    For very crisp bars, remove from the pan and cool completely on a wire rack
    Cut the bars when cool 

no flour GF cookie dough

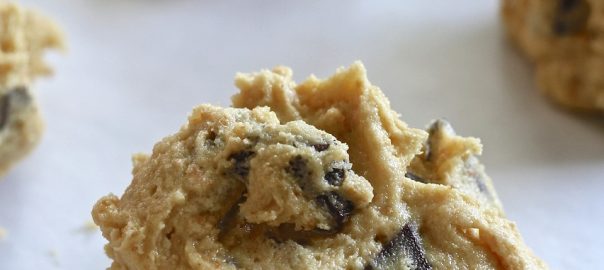
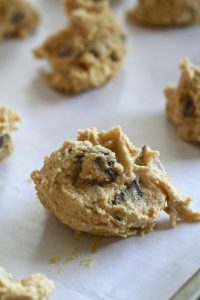
No-Flour Cookie Dough

Remember when you were a teenager and you'd get together with your friends to make cookies? And you wound up eating half the cookie dough before you even got the first batch out of the oven? Okay, well maybe that was just me, but it sure was tasty.

Don't eat that

Fast forward a few years and all of a sudden we were being told not to eat cookie dough because it contained raw eggs and those could be a source of salmonella poisoning. I'll confess that when I was a kid I ate it anyway because I loved it so much. But then when I had kids I wouldn't let them eat it because somehow it was okay if I got sick but not if they did.  So I figured out how to make cookie dough without the eggs.

Then we were told not to eat any raw cookie dough (even without the eggs) because raw flour could be a source of e. coli. That was a bummer. It was also the end of the raw cookie dough in our house.

Going gluten-free

Over time I changed my diet, going gluten-free and reducing the amount of sugar and sugary foods I ate. Giving up the cookies wasn't too difficult. It turns out that as good as I am at baking regular bread, cakes, and cookies, when it came to gluten-free it was more of a challenge. One that for the most part I wasn't interested in trying to figure out. It was easier to give it up or to buy what I wanted from the Gluten-Free Sourdough Company.

In spite of making healthy changes, I confess that every now and then I'd have a secret, sneaky craving for cookie dough. Then one day I was having a conversation with my sister-in-law who told me about a raw cookie dough recipe she had eaten that was made with chickpeas and peanut butter. She couldn't find the recipe but just knowing it was made with chickpeas was enough to get me started. I began to experiment and eventually hit on the recipe listed below. 

The day I came up with the final version my editor for my book The Pantry Principle was visiting. She wanted to know what I was making. I told her it was a healthy version of raw cookie dough and offered her a spoonful right out of the Cuisinart. She loved it! We both dove in with spoons, it was kind of like a return to my high school days.

Cookie dough is popular again

Fast forward yet again and once again raw cookie dough seems to be a big thing. There are companies, cafes, and cookie dough bars opening all over the country. The Minnesota State Fair has even added raw cookie dough to the list of foods available at the fair. I imagine it won't be long before other state fairs follow suit, I fully expect to see it at the Houston Livestock and Rodeo Show next year. The problem is that what's available commercially seems to be made with regular flour (making it a non-option for those who need to eat gluten-free). Commercial options are also high in sugar and definitely, need to be consumed in strict moderation. What I love about my recipe is that because it's made with chickpeas it's got some protein. Don't get me wrong, it still has sugar (especially in those chocolate chips), but I've cut the sugar down to as little as possible making this an option that is as healthy as I think I can make it. 

If you're seeing news blurbs about cookie dough and feeling a sense of nostalgia (and a desire to make cookies just so you can eat the dough) consider making my No-Flour Cookie Dough. Just be aware that this recipe does not bake into cookies, it's meant to be enjoyed raw.

No-Flour Cookie Dough
Print
Ingredients
  1. 1 can chickpeas, drained
  2. 1/2 cup creamy almond butter
  3. 1 tablespoon evaporated cane juice
  4. 1 tablespoon maple syrup
  5. 1 teaspoon vanilla extract
  6. generous pinch sea salt
  7. 1/2 cup chocolate chips
Instructions
  1. Combine first five ingredients in food processor until mixed well
  2. Scoop into a bowl and add chocolate chips by hand
  3. Spoon into ramekins or mini-muffin cups and chill 2 hours before serving
  4. -- or enjoy with a spoon straight out of the bowl 😉
The Ingredient Guru, Mira Dessy https://theingredientguru.com/

September - cholesterol awareness month

September Is Cholesterol Awareness Month – Part 3

Focusing on cholesterol awareness

This month we've covered what you need to know and healthy food choices. I've shared lots of great information to help you really understand the importance of cholesterol and how changing your diet can help with heart health. Now for the best part, delicious recipes!!

After all, let's be honest, it's great to know about what to do to make healthy changes, but sometimes it can be just a little challenging to know what to do with that information.  I'm taking the guesswork out of figuring it out by giving you this great roundup of recipes. I start with a few tasty recipe cards below followed by delicious shares from some of my friends to help you add new recipes for your heart-healthy diet.

Heart-healthy recipes

Garlic

This first one was submitted by Sam, a newsletter subscriber who sent it in along with a delightful story:

Peggy's Garlic Soup
Print
Ingredients
  1. 1 head of garlic, peeled and smashed
  2. 32 ounces organic chicken broth
  3. 32 ounces water
  4. 1 handful each of three of these herbs (fresh): Rosemary, Thyme, Sage, Marjoram
Instructions
  1. Put in a large pot, bring to a boil
  2. Reduce heat and simmer for 45 minutes or till the garlic is soft
  3. Remove garlic and herbs
  4. At this point you can freeze or eat
  5. To eat, put back into pot on LOW heat
  6. Add 1 small container of organic cream
  7. Season with a dash of white pepper
  8. Serve over homemade croutons and Gruyere cheese grated on top
The Ingredient Guru, Mira Dessy https://theingredientguru.com/
If you're shrinking at the thought of peeling an entire bulb of garlic here's a quick an easy way to get the job done.

And now for the story:

My sister's knitting group meets at the library.  Last year the group had a drop-in.  We were talking about fall soups.  She said she once made a garlic soup but lost the recipe. I gave her this one.

Yes, she was THE Peggy! We laughed at how far her soup had traveled before she got it back.

Oat Bran

Another great recipe is oat bran muffins.  Now before you run for the hills I promise, these are delicious. It is important to note that if you're not used to a lot of fiber you will need to start with ½ of a muffin and bumping up by ½ of a muffin every 3-5 days in order to allow the body time to re-regulate when adding this much fiber.

Fruity Oat Bran Muffins
Print
Ingredients
  1. 2 cups oat bran, uncooked
  2. ¼ cup fresh ground flax seed
  3. 2 teaspoons baking powder
  4. ½ teaspoon salt
  5. 1 cup organic whole milk
  6. 2 egg whites, slightly beaten
  7. 1/3 cup honey
  8. 3 tablespoons unsweetened applesauce
  9. 1 cup unsweetened dried cranberries
  10. ¼ cup chopped walnuts
  11. 1 mashed banana
Instructions
  1. Preheat oven to 425 F
  2. Line muffin tins or grease bottoms only
  3. Combine dry ingredients, mix well
  4. Combine wet ingredients
  5. Add wet to dry and mix until combined
  6. Fill muffin tins 3⁄4 full and bake 15-17 minutes
Notes
  1. Pre-ground flaxseed meal is often de-germed for shelf stability.  Flax seeds can be purchased inexpensively and ground into meal at home.  This way you get all of the beneficial parts of the seed. Use a clean coffee grinder, pulse them for one minute and then use.
The Ingredient Guru, Mira Dessy https://theingredientguru.com/


Broccoli Avocado Bowl

This delicious dish is from my friend Shawn Borup. It is one packed with heart-healthy ingredients including leafy greens, avocado, beans, and seeds, so yummy!

Broccoli Avocado Bowl
Print
Sauce
  1. 1 Tbsp. miso
  2. 1 Tbsp. unfiltered apple cider or coconut vinegar
  3. 1 Tbsp. organic tamari or coconut aminos
  4. 1/2 organic lime, juiced
  5. ¼ cup organic Greek yogurt
Bowl
  1. 2 cups organic broccoli, chopped
  2. 3 Tbsp. organic pumpkin seeds
  3. 3 Tbsp. organic sesame seeds
  4. 2 cups organic leafy greens, packed
  5. 1 ripe avocado, sliced
  6. 1 ½ cups cooked white beans (soaked overnight and preferably sprouted) or 1 can, No BPA
Instructions
  1. Mix all your dressing ingredients together in a bowl. Steam the broccoli until crisp-tender, about 8 minutes. Set aside. Toast the pumpkin and sesame seeds in a pan over medium heat until lightly golden. Chop the greens and put into a serving bowl. Add the rest of the ingredients and fold in the sauce. Serve over organic quinoa or brown rice if desired. Top with sauerkraut and cayenne pepper to taste.
The Ingredient Guru, Mira Dessy https://theingredientguru.com/


Recipe Roundup

I reached out to a number of friends and I'm delighted to share all of these amazingly delicious recipes with you.

The goal was to create a list of fabulous new recipes for you that include healthy fats plus use ingredients like garlic, onions, high fiber, fish, olive oil, and are low sugar, no crappy ingredients. This roundup covers a wide range of ideas from dressing to dessert. Be sure to bookmark this page so you can stay up to date as it continues to grow.

For more information about healthy food choices don't forget to check out my book, The Pantry Principle: how to read the label and understand what's really in your food. This is your information resource about the ingredients in your food that are not a good choice for health and how you can take back control of your pantry.


Why Gluten Free Sourdough?

Today's post is from Sharon Kane, the very talented baker and author of The Art of Gluten Free Sourdough Baking.  In this article she shares her journey from sourdough consumer to someone with multiple food sensitivities who needed to find an alternative.  During her long journey to learn how to make gluten-free sourdough bread Sharon was focused on making it as nutritious as possible by continuing to use whole grain flours.  It is important to note that many gluten free products currently on the market are made with enriched and nutritionally deficient flours.  They are also often not soaked and, as she explains below, this is an important part of the process which helps to make the end result more nutritious.

Screen shot 2013-06-20 at 10.00.17 PMSourdough baking is a time-tested bread baking technique that was used exclusively until the discovery of modern commercial yeast. The technique utilizes the natural yeasts and bacteria present on the grain, and in the air, to leaven bread. Sourdough bread becomes highly digestible because the flours are fermented or “soaked” in the starter as well as in the long rise period.

Some people may remember their grandparents soaking oatmeal the night before cooking it for breakfast. Soaking neutralizes natural enzyme inhibitors in the grain, begins breaking down the tough cellulose fibers, fosters the formation of probiotics and enzymes and releases vitamins. All this makes for a more nutritious finished product that is easy on the digestion with many nutrients available for assimilation. Sourdough breads have a robust taste, long shelf life and freeze well.

I became successful at making sourdough rye bread and happily ate the bread for a few years. Then I learned I was gluten intolerant and could no longer eat my beloved rye sourdough bread. I also learned I was highly sensitive to eggs, dairy, soy and commercial yeast.

Wanting to continue eating good bread, I went to the market and saw that all the retail gluten-free breads contained one or more of the ingredients I needed to avoid. I realized that if I wanted bread I needed to be able to control the ingredients and the baking technique.

I began experimenting with gluten-free flours using the rye technique as a guide.  My parameters were:

  • Use gluten-free whole grain flours
  • Minimize the use of high starch flour
  • Use only simple food ingredients so no xanthan or guar gums nor baking powder or soda
  • Minimize the use of all sweeteners
  • Use high quality oils, fats and flavorings

I began experimenting with the sourdough techniques I had mastered for the rye bread and it took one whole year to make a successful bread! Five more years of research and development led me to use different flour combinations and different types of breads.

This type of baking is different from conventional gluten-free baking and is also different from conventional sourdough baking. There is a bit of a learning curve to this technique however many people have mastered it and are happily eating nutritious gluten-free sourdough bread from recipes that are free of gluten, dairy, eggs, soy, yeast, peanuts, baking powder/soda, and xanthan and guar gums.

Don't forget to stop by The Art of Gluten Free Sourdough Baking for a FREE sourdough starter recipe.

Gluten Free Lemon Muffins

I needed to make something to bring to an event that I was attending recently. Knowing that the hostess was sensitive to gluten and dairy I wanted to make sure that I made something that fit her nutritional plan.

Casting around for ideas I spied a pile of fresh Meyer lemons that I had recently been gifted with in the fruit bowl.  These are my absolute favorite lemons. Immensely fragrant they add fabulous lemon-y flavor. I have a small tree that is now making 6-8 lemons a year.  I am eagerly awaiting the day that I get bags full of lemons like my friends.  Fortunately, those same friends are very generous and share.

I had thought about making a lemon quick bread but decided to make muffins instead. The best thing about muffins is that they are so easy to throw together. In just a few minutes you can have all of the ingredients mixed together and into the pan.  Because muffins are so small they bake rather quickly. 

I love lemon-flavored baked goods. Quick breads, scones, muffins, they are all so tasty when they have the added brightness of lemon added to them.  I'm not sure why lemon baked goods don't often make an appearance, more people seem to go for chocolate, or other flavors.  Sometimes sticking with a simple flavor is the best, imho.

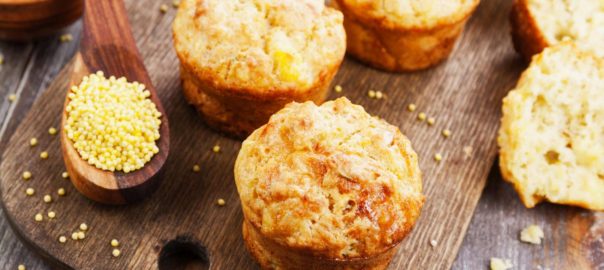
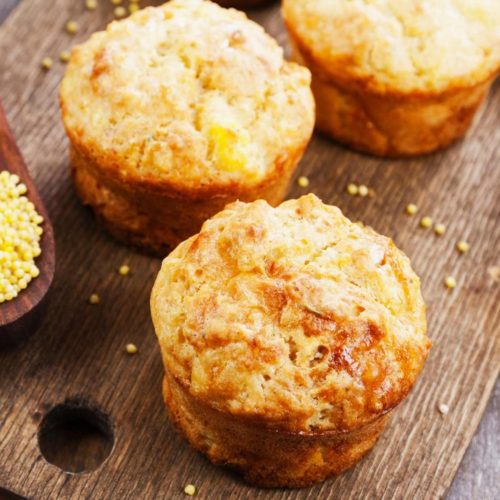
I wanted my muffins to have a little crunch to them so I decided to add some millet which would give a slight pop.  I've used millet before in other baked goods and like the crunch and texture it adds.  

I often play with a recipe multiple times before it's ready for prime time, but this one seemed to come together really well so I'm sharing it as is.  I made it in mini-muffin tins and got three dozen.  They were well received at the event, all of them were eaten and I went home with crumbs.  This is definitely a recipe that's a keeper.  Something not-too-sweet but definitely tasty, perfect with a cup of tea to brighten up a cold, grey, winter morning.

Lemon Millet Muffins

Ingredients
  

  • 1/2 cup coconut oil
  • 1 cup sucanat
  • 1/2 cup evaporated cane juice crystals
  • 1 lemon
  • 2 eggs
  • 1/2 cup almond milk, approximately
  • 1 cup gluten free flour mix (I used a combination of oat, rice, buckwheat, tapioca)
  • 1/4 cup fresh ground flax seeds
  • 1/4 cup (heaping) millet seeds
  • 1 teaspoon baking soda
  • 1/2 teaspoon sea salt

Instructions
 

  • Preheat oven to 350 F
  • Grease three mini-muffin pans (or one regular muffin pan)
  • Zest the lemon
  • Juice the lemon and put juice into a measuring cup
  • Add almond milk until there is 2/3 cup liquid
  • Beat together coconut oil and sugars until fully combined
  • Add eggs, one at a time until well mixed
  • Add lemon zest, baking soda, and the salt
  • Alternate adding flour and curdled milk, making sure they are well mixed
  • Spoon by tablespoonfuls into muffin cups
  • Bake 15 minutes
  • Let cool 2 minutes in the pan
  • Finish cooling on a wire rack

Persimmon Raisin Muffins

It's persimmon season!  I love these tasty little fruits, with their rich fragrant scent and amazing flavor. Luckily for me, there is a pick your own place not too far away.  Each year I go and pick pounds and pounds of them.  I eat as many as I can before they get so ripe and so soft that they are in danger of sliding out of the fruit bowl and off the counter.  They have to be pretty soft before they are ripe enough to eat so this window is pretty small.

When I get to this point I turn the rest into pulp to store in the freezer.  This allows me to make cakes, cookies, and other persimmon delights for as long as the supply lasts. Apparently you can make jam from persimmons but I somehow never seem to get around to doing that.  I'm also not sure if I would use it as I'm currently the only one in the house who likes persimmons.

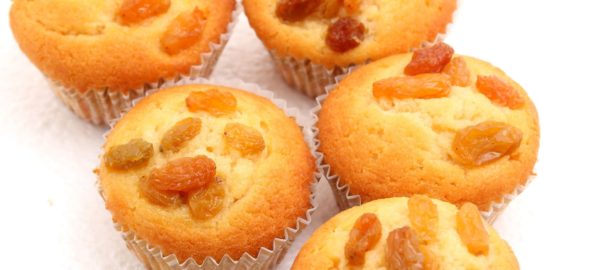
One of my favorite things to bake with persimmons are these muffins.  They're a great treat with a rich dark flavor that is so reminiscent of the crisp fall weather.  I'm sure they would freeze well but somehow they've never lasted long enough for me to test that theory.

Persimmon Raisin Muffins

Ingredients
  

  • 3 cups white whole wheat flour
  • 1 teaspoon cinnamon
  • 1/2 teaspoon nutmeg
  • 1 teaspoon baking soda
  • ½ teaspoon baking powder
  • 1 teaspoon sea salt
  • 1 cup persimmon pulp
  • 1 egg
  • 1 cup sucanat
  • 1 tablespoon vanilla
  • 1 cup raisins
  • 1 cup chopped pecans

Instructions
 

  • Preheat oven to 375°F
  • Grease loaf pans
  • Sift together flour, cinnamon, nutmeg, baking soda, baking powder and salt
  • In a separate bowl beat egg, add persimmon pulp and sucanat
  • Add vanilla, raisins and pecans
  • Add sifted ingredients and mix well
  • Spoon into greased muffin tins
  • Bake 15 minutes or until tops spring back when tapped
  • Remove from oven and cool in tins 3-4 minutes before moving to wire rack
  • Finish cooling on wire rack

Gluten Free Cookie Fun

Walking into The G's Healthy Gourmet with a couple of borrowed kids I am greeted by the sounds of Christmas carols playing over the speakers and the sight of children rolling dough and sprinkling flour.  Tiffany, the Pastry Chef, and her husband, Nick, the Executive Chef at The G's, greet us at the door.   We settle at a table while Tiffany brings us our supplies…rolling pins, a block of cookie dough, a bowl of her own specialty gluten-free flour, cookie cutters, milk (because what goes better with cookies than milk?) and a plate of cookies to munch on while we are working.

Rolling out the slightly cold dough and pressing the cutters into it is a lot of fun for the kids.  It's hard to get the cold dough started, the adults help get things going.  Some of the children seem to really like the idea of flouring the table, the rolling pin, the dough, the floor; Tiffany assures the adult guests that they have someone coming in to clean up after the event is over.  Rolling, cutting, reshaping and re-rolling the dough, the kids are having a lot of fun.  Excitedly chattering away about the choices of cookie cutters they are using the children quickly fill up their baking trays.  After getting each child to initial their parchment paper lined tray Tiffany and Eric, her assistant, take the cookies back into the kitchen and slide them into the oven.


Ten long agonizing minutes.  Waiting and waiting for those cookies to come out of the oven.  Playing with flour.  Making shapes out of left over dough.  Is it ten minutes yet?  Are the cookies ready yet?

Then the wait is over and the warm cookies arrive.  A pretty pile of holiday shapes all waiting for their final transformation.  With them come bowls of fluffy frosting (a serious temptation for little fingers), parchment paper frosting-filled bags and the excitement of creating a masterpiece.

It was clearly obvious that everyone, kids, parents, the folks at The G's, had a good time.  Each child went home with their cookies carefully placed into a stack of take-out boxes, proudly carrying the haul of their handmade creations.  What a  sweet way to start the holiday season.

Baking With Kids

Baking is wonderful and something I love to do. Even more fun is to bake with kids.  They're so excited and fascinated by the process.  Learning their way around the ingredients, how to measure, the wet and dry combining process; it's a fun edible science and math experiment in the kitchen.

This is one of my baking buddies, Miss A.  She came over the other day with her brother, Mr. C.   I had promised them that the next time they came over we would make cookies so that was our plan.

As it turns out Mr. C's idea of making cookies was to allow his sister and I to do all the baking while he played the part of Official Cookie Tester.  And, might I add, he was rather impatient for those cookies to be done.

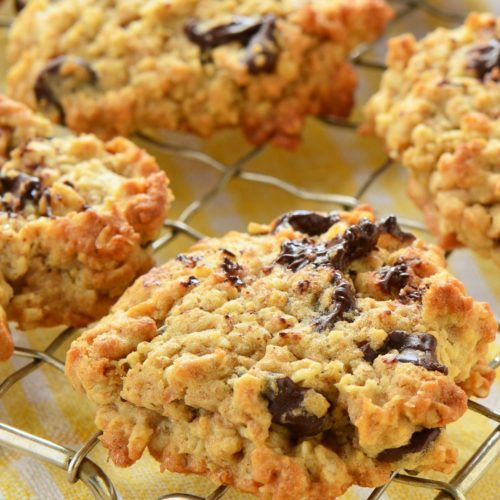
Miss A and I got down to business, put on our aprons and got out my "Famous Chocolate Chip Oaties" recipe.  Mr. C. wanted to know why they were famous, had they been on t.v.? Did someone famous invent them?  I told him that it was a recipe I had created and I simply call them Famous because everyone who eats them really likes them and wants more.

Needless to say he was less than impressed and informed me that unless they've been on t.v. they can't be famous.  Maybe I should send a box to Ellen?

One of the things I love about baking with kids is how curious they are.  Miss A wanted to taste everything.  Of course we decided that the chocolate chips were pretty tasty. Surprisingly she liked the oatmeal, even raw, and requested a large spoonful of her own to nibble on.  We had two kinds of sugar and she tasted both of them.  Then we got to the baking soda.  

Miss A asked if she could taste it.  I was a little surprised and said, "I'm not sure you want to do that."

"Why?" she asked.

"Well," I replied "it's a little bitter tasting and I'm not sure you're going to like it."

"But I want to taste everything." she said.
So I let her taste it.

Her face scrunched up a little and she said, "It's not really bitter but I don't like it."

"Want some chocolate chips to wash that down?" I asked.

Of course the answer was yes.

We wound up making two batches of cookies the regular variety and the peanut butter variety.  The recipe is below and we're sure you're going to enjoy it, just like we did.

Famous Chocolate Chip Oaties

Ingredients
  

  • 1/2 C butter
  • 1 C evaporated cane juice crystals
  • 1 egg
  • 1/2 t. vanilla
  • 1 C + 2 T white whole wheat flour
  • 1/2 t. salt
  • 1/2 t. baking soda
  • 1 C chocolate chips
  • 1 C rolled oats

Instructions
 

  • Preheat oven to 375
  • Blend together butter and sugar until creamy
  • Add egg and blend well
  • Add vanilla and blend well
  • Mix together flour, salt and baking soda and sift into butter mixture
  • Blend in chocolate chips
  • Blend in oats
  • Drop by spoonfuls onto a greased baking sheet
  • Bake 10 minutes
  • Let sit on baking sheet 2 minutes
  • Move to rack to finish cooling
  • For the Peanut Butter variety:
    Substitute sucanat for the evaporated cane juice crystals
    Add 1/2 C chunky peanut butter

banana oat pancakes

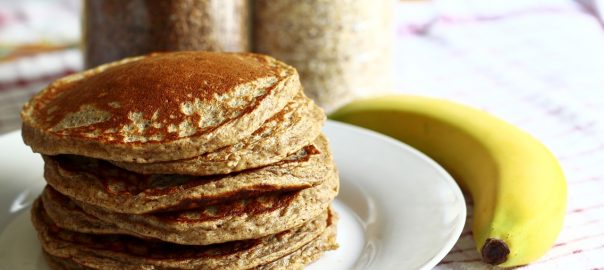
Banana Oat Pancakes

Do you love pancakes?

We love pancakes in our house.  They are a great, easy to make, healthy, whole-grain breakfast.  Throw in some fresh fruit and maybe a little homemade Greek yogurt and it's the perfect meal to start your day…filling, nutritious, blood-sugar balancing, and, most importantly, delicious.  Of course, pancakes are also delicious at any time [breakfast for dinner anyone?].

Using whole grains

I love it when I find a recipe that is so perfect it doesn't need anything else.  This recipe is one of them.  From my King Arthur Flour Whole Grain Baking book, it's a recipe that is a consistent favorite.  I love the fact that it's made from whole grains.  Although I make my own oat flour by grinding oat groats you can easily make it at home by placing old fashioned oats in the food processor or blender and blending it until it reaches a fine consistency.  If that's more than you are willing to do you can also just buy it, both Arrowhead Mills and Bob's Red Mill sell oat flour or you can get certified gluten-free oat flour from Legacy Valley or Cream Hill Estates.

As a quick side note, because oats tend to be grown near, stored with or transported with other glutinous grains, most specifically wheat, if you're following a gluten-free diet you'll need to make sure you're getting certified gluten-free oats.  Certified producers grow and process only oats, guaranteeing that there is no cross-contamination.

This recipe is simple and delicious. One of the things that my family likes so much about it is that the pancakes are very fluffy.  You don't realize that these are whole grain oat pancakes they are that light and airy.  The bananas combined with the cinnamon and nutmeg make it a delicious way to start your day.  I also like having another great recipe that allows me to use up any almost over-ripe bananas.

King Arthur Flour's Banana-Oat Pancakes
Print
Ingredients
  1. 3 small bananas mashed
  2. 2 T. unsalted butter melted (use organic)
  3. 1 T. lemon juice
  4. 1 T. sugar (I reduce this to 1 t. as the bananas when they are this ripe have a lot of natural sugars)
  5. 2 eggs
  6. 1 C. oat flour
  7. 1/2 t. baking soda
  8. 1/2 t. salt
  9. 1/2 t. ground cinnamon
  10. 1/2 t. ground nutmeg
Instructions
  1. Stir together the mashed bananas, butter, lemon juice and sugar in a medium bowl.
  2. Beat in the eggs.
  3. Whisk together the oat flour, baking soda, salt and spices in a small bowl.
  4. Form a well in the center of the dry ingredients and pour in the wet ingredients.
  5. Stir the batter just until the dry ingredients are thoroughly moistened.
  6. Check to be sure the batter is thin enough for your pancakes; you may need to add a touch of milk or water (I never do)
  7. Let the batter sit 10 minutes before using.
  8. Heat a nonstick griddle or heavy skillet.
  9. If your surface is not non-stick brush it lightly with vegetable oil.
  10. When the surface is ready spoon batter 1/4 C. at a time into the pan.
  11. Let the pancakes cook on the first side until bubbles begin to for around the edges, 3-4 minutes.
  12. When the pancakes are just beginning to set flip then and let them cook on the second side, about 1 1/2 minutes more.
  13. You can sprinkle toasted walnuts over the batter just before cooking as an extra treat.
The Ingredient Guru, Mira Dessy https://theingredientguru.com/