Category Archives: bread


Guide To Freezing Food: What You Can And Can’t Put In The Freezer

Did you know that the United States is the global leader in food waste? In fact, nearly 40% of the US food supply is wasted each year. That’s approximately 133 billion pounds and $161 billion worth of food.

According to the US Department of Agriculture (USDA), food spoilage is one of the main reasons why Americans throw out food. So how do we tackle food waste? The USDA suggests improving labeling, food storage, cooking methods, among others. 

To help with the movement against food waste, let’s talk about one of the greatest inventions that can help avoid spoilage– the freezer!

Here’s some food for thought: freezing is one of the oldest and safest methods to preserve food, with no chemical preservatives needed. However, many of us are not sure how to properly freeze food.

Which food is safe to freeze? How long can you freeze food? Is it okay to refreeze thawed meat?

Print and stick these guidelines on your fridge door for every family member’s reference: 

Food you can freeze


Truthfully, You can freeze almost any food, except for canned food or eggs in shells . Canned foods may be frozen once the food is out of the can. 

  • Baked goods – Be sure to wrap it in parchment paper before you wrap it in plastic or foil. If possible, consider storing in glass containers.
  • Cheese – If it is brick or shredded cheese, such as cheddar, Colby, Monterey Jack
  • Dairy – Be aware that cottage cheese, cream cheese, sour cream, etc. can be a little more liquidy after thawing.
  • Raw eggs – It is not safe to freeze raw eggs in the shell.  Eggs can be frozen either just the yolks beaten together, just the whites beaten together, or yolks and whites beaten together and then put in the freezer. Frozen whites will not loft after thawing. Be sure to label your package with the number of eggs. These are best for omelets, quiche, or baking.
  • Guacamole – Be prepared to eat it all when you thaw it because it turns brown pretty quickly (i.e., freeze in small containers).
  • Herbs (fresh) – Wash and dry thoroughly before freezing. You can also mince and put into an ice cube tray with some oil to make herbed oils for cooking or roll into butter and freeze this compound butter for cooking.
  • Honey – Theoretically, honey lasts a v-e-r-y long time, so there’s no need to do that.
  • Hummus – Fresh hummus is so much better.
  • Jam – Most jams are store-bought and shelf-stable. Otherwise, I’m assuming that you’re making your own and simply don’t want to process it. In that case, make sure there is some expansion room at the top of the container (this is called headspace).
  • Margarine – You can freeze it, but I DON’T recommend eating margarine! 
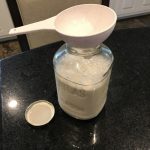
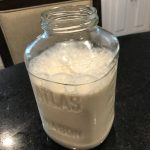
  • Cow milk – Pour a little out of the container to allow for freezer expansion
  • Nuts – A freezer is a perfect place to store them because they don’t go rancid quickly from all of their natural oils.
  • Orange juice – Although it freezes better (i.e., won’t separate as much) in smaller containers, it needs to be stirred to bring back together after thawing.
  • Salsa – You need to make sure there’s a little space at the top of the jar for the salsa to expand. Thaw fully and stir to combine before eating.
  • Wine – Technically yes, it supposedly does well in ice cube trays. I’ve had mixed success with this. My recommendation is to get a mother of vinegar, a vinegar crock, and use leftover wine for making vinegar instead.

Food you shouldn’t freeze


Some foods don't freeze well, such as mayonnaise, cream sauce, and lettuce. Cooked meat tends to dry out when frozen, so raw meat and poultry will maintain their quality longer in the freezer.

  • Almond milk – It separates, and the texture is pretty gross!
  • Coconut milk – It’s best for baking or including in something else. I don’t like the way it tastes/feels after it’s been frozen
  • Deep-fried food – You’ll lose that nice crisp and make them soggy
  • Cream-based products such as sour cream – The texture will change. Frozen sour cream is best used in cooked dishes
  • Mayonnaise – The texture can be a bit off after it’s frozen. But mayonnaise is so easy to make at home that I suggest having the ingredients on hand rather than freezing it.
  • Soft cheese – Brie and camembert can be technically frozen, but their consistency changes after thawing. Goat cheese seems to freeze okay, but the flavor may change slightly.
  • Cooked pasta – If it’s not al dente, it could become mushy and disintegrate when you reheat it
  • Gravy – As long as it is flour-based. Cream or milk-based gravies will not freeze well
  • Vegetables with high water content – These foods can become soggy and water-logged when thawed.
  • Salad – Does not freeze well

How long can you keep food in the freezer?


According to FoodSafety.gov, “frozen foods stored continuously at 0 °F or below can be kept indefinitely.” Note that the guidelines for freezer storage below are for quality only. 

  • Hotdogs, bacon, sausage – 1-2 months
  • Luncheon meat – 1-2 months
  • Hamburger and other ground meats – 3-4 months
  • Fresh beef, lamb, and pork – 4-12 months
  • Cooked, store-wrapped ham – 1-2 months
  • Fresh whole chicken –  One year
  • Raw eggs – One year
  • Soups and stews – 2-3 months
  • Leftovers, such as cooked meat and poultry – 2-6 months

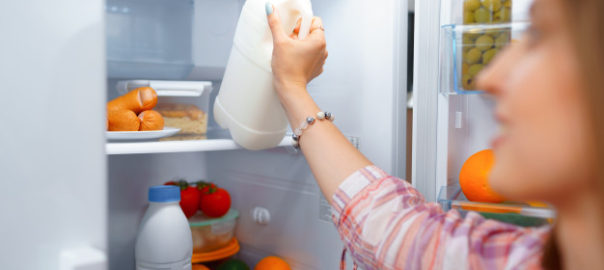
Food Safety During Power Outage


During a power outage, the refrigerator can keep the food safe for up to 4 hours. It’s safe to discard refrigerated perishable food such as meat, poultry, fish, eggs, and leftovers after 4 hours to avoid food poisoning. 

You may also want to keep a nickel in your freezer to let you know just how much the contents thawed during a power outage. Put a cup of water in the freezer. Once it’s frozen place a nickel on top of it.  If the power goes out the nickel let’s you know if your food stayed frozen. When you look at the cup after a power outage if the nickel is below the surface of the ice (or even, sadly, at the bottom of the cup) that let’s you know your freezer defrosted significantly and the items in it thawed and then refroze. They are most likely no longer safe to eat and should be thrown out. ⁠

Easy & healthy freezer meal recipes


If you’re looking for ideas on how to fill your freezer, refer to my Fast Fun Freezer Meals class. Get the information and recipes you need to prepare for a week’s worth of dinner — ready to put in the freezer in less than 90 minutes!

Do you have freezing or any food-related questions? Follow me on Instagram @theingredientguru; I’d be glad to reply to your comments! 


Sources:

  •  https://www.foodsafety.gov/food-safety-charts/cold-food-storage-charts
  • https://www.usda.gov/foodwaste/faqs
  • https://www.fsis.usda.gov/wps/portal/fsis/topics/food-safety-education/get-answers/food-safety-fact-sheets/safe-food-handling/freezing-and-food-safety

How To Make Non-Dairy Milk

If you are one of the approximately 65% of all adult humans who have trouble with lactose, you may have considered switching to non-dairy milk products. If nothing else, simply because you're tired of always paying more for lactose-free [insert dairy product here], or because you keep forgetting to bring your lactase enzymes with you.

What is lactose intolerance?

For those that may be struggling with this issue and learning about this for the first time, allow me to explain. Lactose intolerance is where the body cannot properly break down lactose, milk sugar. This can cause a number of symptoms including diarrhea, cramps, bloating, gas, nausea, and, although not frequent, vomiting.

Lactose, by the way, is why things like milk list 11g of sugar per cup on the label. There's no added sugar in the milk, it's part of the milk. Side note: if you're going to drink or consume milk, I strongly suggest that it be whole milk and organic, preferably pasture-raised. This also applies to or yogurt, or other dairy products. 

For those people who cannot tolerate lactose, most of the population, there is a solution. To purchase dairy products where the lactose has been split into it's component parts of galactose and glucose, making it easier to digest. Or taking lactase, an enzyme that their system lacks, which helps to break down the lactose.Other options

For those who would rather not deal with the issues around lactose intolerance there is another option. Plant-based milks. These are made by processing certain things like almonds, coconut, oats, rice, or hemp, and making a milk-like product. While it doesn't taste like milk, it's close enough that it's often an acceptable substitute.

Drinking plant-based milks can, however, come with it's own challenges. One is that because the plant-based options are thinner than milk, emulsifiers and thickeners are added. These are made from plant gums which can cause digestive upset if over consumed or for those with very sensitive digestive tracts.

Carrageenan in particular is strongly linked to digestive health issues and should be avoided in any product. Other plant gums can be just as overwhelming to the system, causing many of the problems that lactose does.

Making almond milk at home

Instead of buying plant milks at the store it is possible to make them at home. Almond and coconut are the easiest to make yourself. With just a little bit of time, a few healthy ingredients, and not a lot of equipment, you can enjoy your own delicious homemade milk.

Almond Milk

  • 2 cups almonds
  • 4 cups filtered water
  • 1 teaspoon sea salt
  • 1 teaspoon vanilla extract (optional)
  1. Soak almonds in water overnight
  2. Discard soaking water and rinse almonds well
  3. Place almonds, salt, vanilla, and 4 cups of water in a high powered blender
  4. Blend on high speed for 2 minutes
  5. Strain through cheesecloth or a nut milk bag
  6. Solids can be refrigerated and used in baking within 4-5 days
  7. Refrigerate almond milk before serving

No Soy

You may be wondering why soy milk is not on my suggested list of plant-based milks. I don't recommend consuming it because soy tends to be one of the most highly genetically modified crops we have. Soy is also a phytoestrogen, meaning plant estrogen, and can disrupt hormones. Therefore it's best to avoid not only soy milk, but also the wide variety of soy-based products on the market.

Sources

 
Nardi, J. et al. Prepubertal subchronic exposure to soy milk and glyphosate leads to endocrine disruption. Food and Chemical Toxicology
Volume 100, February 2017, Pages 247-252. https://www.sciencedirect.com/science/article/pii/S0278691516304896

Why Gluten Free Sourdough?

Today's post is from Sharon Kane, the very talented baker and author of The Art of Gluten Free Sourdough Baking.  In this article she shares her journey from sourdough consumer to someone with multiple food sensitivities who needed to find an alternative.  During her long journey to learn how to make gluten-free sourdough bread Sharon was focused on making it as nutritious as possible by continuing to use whole grain flours.  It is important to note that many gluten free products currently on the market are made with enriched and nutritionally deficient flours.  They are also often not soaked and, as she explains below, this is an important part of the process which helps to make the end result more nutritious.

Screen shot 2013-06-20 at 10.00.17 PMSourdough baking is a time-tested bread baking technique that was used exclusively until the discovery of modern commercial yeast. The technique utilizes the natural yeasts and bacteria present on the grain, and in the air, to leaven bread. Sourdough bread becomes highly digestible because the flours are fermented or “soaked” in the starter as well as in the long rise period.

Some people may remember their grandparents soaking oatmeal the night before cooking it for breakfast. Soaking neutralizes natural enzyme inhibitors in the grain, begins breaking down the tough cellulose fibers, fosters the formation of probiotics and enzymes and releases vitamins. All this makes for a more nutritious finished product that is easy on the digestion with many nutrients available for assimilation. Sourdough breads have a robust taste, long shelf life and freeze well.

I became successful at making sourdough rye bread and happily ate the bread for a few years. Then I learned I was gluten intolerant and could no longer eat my beloved rye sourdough bread. I also learned I was highly sensitive to eggs, dairy, soy and commercial yeast.

Wanting to continue eating good bread, I went to the market and saw that all the retail gluten-free breads contained one or more of the ingredients I needed to avoid. I realized that if I wanted bread I needed to be able to control the ingredients and the baking technique.

I began experimenting with gluten-free flours using the rye technique as a guide.  My parameters were:

  • Use gluten-free whole grain flours
  • Minimize the use of high starch flour
  • Use only simple food ingredients so no xanthan or guar gums nor baking powder or soda
  • Minimize the use of all sweeteners
  • Use high quality oils, fats and flavorings

I began experimenting with the sourdough techniques I had mastered for the rye bread and it took one whole year to make a successful bread! Five more years of research and development led me to use different flour combinations and different types of breads.

This type of baking is different from conventional gluten-free baking and is also different from conventional sourdough baking. There is a bit of a learning curve to this technique however many people have mastered it and are happily eating nutritious gluten-free sourdough bread from recipes that are free of gluten, dairy, eggs, soy, yeast, peanuts, baking powder/soda, and xanthan and guar gums.

Don't forget to stop by The Art of Gluten Free Sourdough Baking for a FREE sourdough starter recipe.

Cottage Loaf


Over on my Facebook Fan Page I wrote about a recent experiment in bread making.  I took one of my favorite quick rise bread recipes and used the baking method from no-knead bread.  The bread rose really well.  At first I was sort of disappointed because it rose REALLY well, I was making it in 2 quart pyrex containers (I don't own a 5 quart cast iron dutch oven as called for in no-knead bread) and I wound up with 2 quart-casserole-dish-shaped bread.  However, as you can see from the picture, once turned out of it's container I realized it looked beautiful.    I got a fabulous rise and the crumb is very even and beautiful. 


Helayne asked for the recipe so here it is:


Cottage Loaf
[makes one loaf but doubles very well]


5-6 C. bread flour
2 T. yeast
2 T. evaporated cane juice crystals
1 T. sea salt
1 t. ground ginger
2 C. hot water


In a large bowl mix together 2 C. flour, the yeast, salt, sugar and ground ginger
Add hot water and stir well
Add flour 1 C. at a time until dough is no longer sticky
Knead for 8 minutes until dough is ready (I have a really big bowl and I just knead directly in the bowl)
Oil dough and return to the bowl
Cover with a dishtowel and let rise in a draft free place for one hour
Punch down, shape dough into a ball and place in a bowl lined with a well-floured towel
Recover dough
Take 2 quart covered casserole dish and place in the oven
Set oven to 475
When oven is done preheating open dish, slide dough into dish, place lid back on casserole
Bake 30 minutes then remove lid and bake another 20-25 minutes until bread is done
Remove bread from casserole and cool on wire rack completely before cutting 


The waiting part is very difficult to accomplish as the smell of freshly baked bread permeates the house like nothing else and draws hungry folk in a hurry.


I made this bread using King Arthur Bread Flour.  Although I bake a lot of bread using whole grain or fresh ground flours occasionally I will use unbleached all-purpose or bread flour.  Then I experiment from there to see how much I can modify it and change to less processed grains.  The next experiment with this loaf will be to see if I can substitute 1/2 of the flour for whole wheat and what happens from there.  


I'll keep you posted.

Homemade Rolls


Susan asked, “
I wondered if you might have a resource for homemade wheat rolls (or other dinner-y kind of breads) that could be made up to a certain point and then frozen. So that you could make up a whole bunch when you have time, and then just cook a few at a time when you want them. I've been googling and haven't really come up with anything. We're trying to accommodate the starch eater/cravers in the household while substituting for healthier alternatives. Thank you very much for any ideas.

I don't have any whole grain par-baked bread recipes. Part of the difficulty, as I find it, is that working with whole grains changes the gluten structure, the higher fiber retards the rise. So when I try to par-bake and freeze the rolls they never rise right. Freezing the unbaked dough is tough because the freezing process kills the yeast and the thawing bread never seems to rise correctly, adding extra yeast doesn't work because then you're starting all over again.

My suggestion would be to find a whole grain bread recipe that you like and make rolls, soft bread sticks, even slice the loaf after baking, and freeze the results. You can thaw them for those that want it and then warm it up in the over for that “fresh-baked” aroma and warmth.


photo courtesy of Fir002 | Wikimedia Commons

Local Grain Source

As many of you know I love to bake. Specifically I love to bake with whole grains. This way my family gets all of the benefit of the grain, the fiber to help slow down the digestion of the starchy endosperm and help stabilize blood sugar, and the germ with all of it's nutrient goodness.

When we moved here I felt fortunate that our local grocery store carried whole grains in the health food section. Unfortunately they recently decided to stop carrying them which left me without a local source. But all of that has changed now thanks to my friend Jinks. Her new website Yummy Bread Kneads is a new local source for whole grains and she'll be sharing some great recipes.

Be sure to check it out.

photo courtesy of Rainer_Zenz | Wikimedia Commons

No-knead Mesquite Bread

Those inventive folks over at Craftzine.com have come up with a new twist on the, by now, ubiquitous no-knead bread. Laura, one of the Editorial Assistants, found my post about mesquite flour and emailed me to let me know about this really fun article on how to harvest and process mesquite to make the flour. It includes a recipe for No-Knead Mesquite Bread which they said I could share with all of you. Living here in Texas I know we have mesquite, but there isn't any in my area. I'm going to have to learn to identify it though so that if I find any in my travels I can harvest the pods.

No Knead Mesquite Bread Recipe

3 cups white flour
3 tbls mesquite flour
½ tsp yeast
1 ½ tsp salt
1 ½ cups of water

Mix dry ingredients in a bowl
Add water and mix
Stir with fork (mix will be sticky)
Cover in a bowl, let sit overnight
Place bread dough on cutting board covered with towel for 2 hours
In metal bowl bake in sun oven @ 350 for 1 hour

photo courtesy of: Wendy Tremayne

Gluten

On a forum that I belong to Shannon asked the following question: “I've used vital wheat gluten to achieve a more tender crumb when baking traditional/artisanal breads with whole grain flours. I'm still not sure if vital wheat gluten is a heavily-manufactured and processed product. Anyone have experience or knowledge on this? If it is heavily processed, is there a good substitute in whole grain baking?

Here is my reply:

Gluten is the protein in wheat, rye, barley and triticale. There is some controversy as to whether oats have gluten or not. Obviously if there are any celiac or gluten sensitivity issues you cannot use gluten in any cooking or baking. This answer assumes there are no gluten issues.

Vital Wheat Gluten is nothing more than concentrated gluten. Many vegans and several Asian cultures use it to make a meat substitute called seitan (sometimes referred to as “wheat meat”) which can be cooked almost like meat.

Gluten can be obtained by washing it out of flour but because the process is so lengthy many people just use vital wheat gluten. I do not have any specifics on how vital wheat gluten is created commercially.

Gluten, especially used with whole grain flour, is usually referred to as a conditioning agent. This is because the extra fiber in the whole grain flour retards the gluten and slows down the rise. By ‘conditioning' the dough you can get a better texture, a higher loft, and sometimes a moister crumb. Gluten is also added to low gluten flours to get the dough to stretch. The typical amount to add is 1-2 Tbsp per batch. Be aware that if you add to much your loaf with over-rise and then collapse.

Other conditioners include lecithin (you can use approximately 1 tsp per loaf in your recipe), citric acid (just a pinch, okay a generous pinch if it is a two loaf batch, otherwise your bread will taste very citrus-y) and powdered ginger (as my Uncle Joe used to say, “It aggravates the yeast.” Use up to 1/2 tsp per loaf). You can combine these conditioners in differing amounts to see what will work with your recipe. You can also use barley malt as a conditioning agent.

Be aware that commercially there are lots of chemicals that are used instead of natural substances. Chemical dough conditioners (also called improving agents) include azodicarbonamide, carbamide, sodium stearoyl 2 lactylate, calcium stearoyl lactate, bethoxylated and succinylated monoglycerides, and polysorbate 60.

photo courtesy of freephoto.com

Dough Flying Everywhere

I recently came across a video of Richard Bertinet's slap-and-fold method of working bread dough. You can find the video here.

As with the No Knead Bread phenomenon that swept the foodie sites a couple of years ago, I wanted to modify this to work for me. What that means is I wanted to use fresh ground, whole grain flour. I decided to try this new method with an overnight soaked dough that I like because it has great flavor and usually turns out pretty fluffy. I wanted to know how the slap-and-fold method would affect the consistency of the dough.

My first challenge was how wet the dough was. Halfway through the slapping and folding I realized that perhaps a fluffy dough was not the dough to be doing this with, I probably should have started with a more rustic dough. Also, it might have made sense to try it with all-purpose flour, as the recipe calls for, but I didn't. The flour I used was fresh ground, 1/2 spelt, 1/2 hard red wheat, soaked overnight in buttermilk.

After I mixed in the rest of the ingredients I followed the instructions and began to slap the dough against the counter. I dutifully resisted the urge to add more flour. The dough was very wet and it was tempting to add flour at least to clean off my hands. It took a while to learn to control the dough. I must be the world's messiest dough slapper because there was dough everywhere. Little bits would fly off and stick to the back wall, to the underside of the cabinets, as well as all around me onto the floor. it also seemed to take a rather long time for the dough to become cohesive. But I persisted. I know that I worked the dough far longer than the video suggested was necessary but I did eventually get a nice smooth ball of dough which I returned to the bowl and covered to let rise.

The dough took longer than expected to rise, about 2 hours. Punched down, formed into two boules and set to rise again. This rise seemed normal. I baked it in the oven and it seemed to turn out well. As the picture shows it made two really lovely boules, nice and fragrant, soft crust, dense crumb with a rich flavor. The bread turned out really well and was worth the effort.

I'm not convinced that I'm going to start slapping dough on a regular basis but I am going to try this again. I plan to back up and start with Mr. Bertinet's sweet dough recipe and then try again to modify it to whole grains. It was fun to experiment with the dough and see the results; it's also fun to think about what will happen with other changes and then try those ideas out.

I believe we need to do more than simply eat our food, we need to enjoy it. So I encourage you to play with your food, savor it with all of your senses; that includes thinking about how it's made.

Be well.