Category Archives: vegetarian


Vegan Shame


What is vegan shame?

I recently read about a new website, called Vegan Shame, which has been created to publicly castigate vegans who have gone away from this style of eating. I'm stunned at the militant attitude that many people take toward their food and wonder how we've come to a point that someone's nutritional plan has become another form of tribalism; promoting a dogmatic adherence to diet.

A website geared toward creating an attitude of shame around food is, in my opinion, harmful.  You should not feel bad about what you eat.  We all need to learn to eat in a way that fits our bio-individual requirements and promotes health for our bio-individual bodies.  The most important thing to remember is that there is no one-size-fits-all nutritional plan.  It's just not possible to have one nutritional plan that provides perfect nutrition for every single person on the face of the planet.

Eat for your health

There are many different nutritional plans that work for a vast number of people.  There are basic nutritional needs that we all have.  But we cannot all eat the same thing all the time.  Sadly, because they need to sell their book, program, supplements, or meal-plans, many diets out there promote themselves as “the only plan you need.”  Many are good, some are better than others, but none that I have seen thus far are perfect for everyone.

I frequently have to remind people of this. One example I use is the Atkins Diet. Although not so popular anymore, at one point it was all the rage. Some people were delighted. “Look at me! I'm eating bacon cheeseburgers and I lost 25 pounds!” While their next-door neighbor is wondering why it's not working for them because they're following the exact same diet and yet they only lost 4 pounds. That is bio-individuality at work. 

What does your body really need?

The truth of the matter is that in addition to bio-individual health, your nutritional needs vary throughout your lifetime due to basic biological changes. Let's be realistic, if your nutrition needs never changed you'd still be drinking breast milk.   As you age you tend to produce less digestive enzymes.  Or certain health issues require you to change your diet to avoid or add foods that will be more supportive of your health.   Again, this leads to no one diet being the penultimate choice for every person throughout their lifespan. Unfortunately, society persists in promoting the myth that one size should fit all when it comes to diet.  And it makes no allowances for variables that can impact health. 

Food cultures

Food choices are complicated by a number of factors.  Firstly there are cultural food preferences; people in different countries learn to prefer different foods or food combinations.  Then there are the -isms of the food world, omnivorous eaters, vegetarians, vegans, macrobiotic eaters, and more.  This is compounded by the immense variety of “diets”, South Beach, Zone, Atkins, and a huge number more.  Then there are those who have food sensitivities and truly must avoid certain foods.  This creates a rich and diverse mix of food cultures. 

This mix is one that we should welcome.  Of more importance than creating a hardcore, militant attitude toward food, I encourage you to learn to eat well for your body. To be in tune with your body and choose what is nourishing and supportive for you.

We should all support ourselves, in health, by loving ourselves, loving our bodies, and making positive choices and associations with food.  And let's not shame or disparage those who eat differently than we do.


Swiss Chard Two Ways

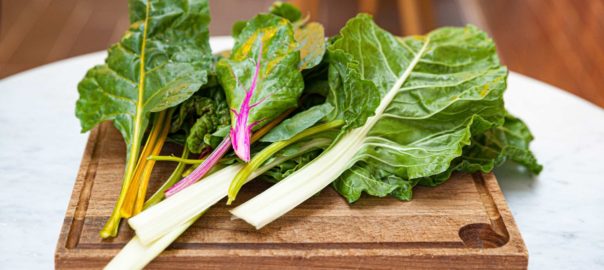
The other night I picked the last of my Swiss chard from our garden for dinner. It's one of my favorite dark leafy green vegetables. Antioxidant-rich, loaded with vitamins K, A, and C, Swiss chard also provides a healthy dose of magnesium.

Often when we eat it I make simple sauteed greens. This time, however, I wanted to do something different and came up with these two recipes, using the entire leaf. 

Although most people throw out the stems, they are delicious and can be cooked in a variety of ways. These are the two recipes I created using all of the Swiss chard. I can't wait to plant more and enjoy this again.

Braised Carrots and Swiss Chard Stems

Ingredients
  

  • ½ onion, diced
  • 8 carrots, sliced into ½ inch pieces
  • Stems from Swiss chard, cut into ½ inch pieces
  • 2 tablespoons butter
  • ¼ cup water
  • Sea salt and fresh ground pepper to taste

Instructions
 

  • In a large pan melt butter
  • Saute onions until starting to turn golden color
  • Add carrots and Swiss chard stems
  • Stir to coat with butter
  • Add water and bring to a boil
  • Reduce heat and cover
  • Cook until carrots are tender (about 15 minutes)
  • Add salt and pepper to taste

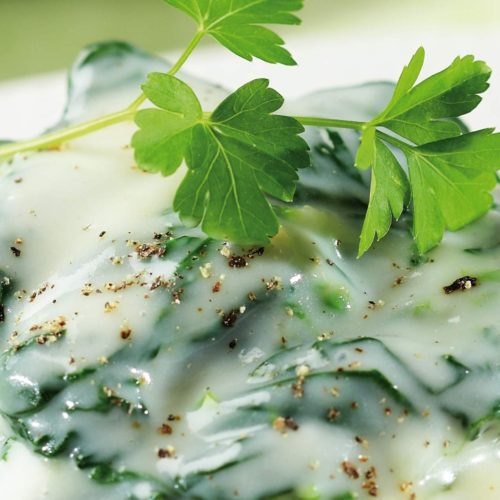
Creamed Swiss Chard

Ingredients
  

  • Large bunch of Swiss chard
  • ½ cup boiling water
  • ½ onion, diced
  • 1 clove garlic, pressed
  • 2 tablespoons butter
  • ½ cup organic sour cream
  •  ½ cup organic whole milk
  • sea salt and fresh ground nutmeg to taste

Instructions
 

  • Trim stems from Swiss chard
  • Cut leaves into 1” pieces
  • Wilt in boiling water until limp
  • In a large saucepan melt butter
  • Saute onions and garlic until onions start to turn golden color
  • Whisk sour cream and milk together
  • Pour over onions and heat until just starting to bubble
  • Add wilted Swiss chard leaves
  • Bring to a boil, stirring frequently
  • Reduce heat to just under boiling
  • Cook 5-7 minutes until sauce thickens slightly
  • Add sea salt and fresh ground nutmeg to taste

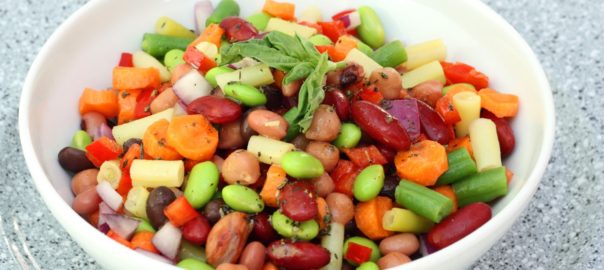
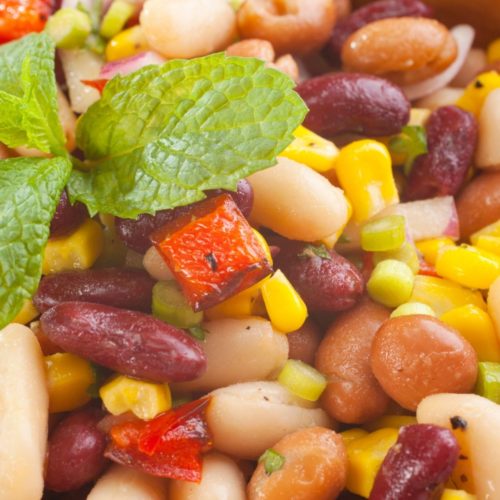
Three Bean Salad

This is a guest post by my Aunt Haya who recently shared a very sweet story about food, connections and memories.  I love food stories.  I like hearing where food came from, how it's changed, and the associations we make with our food; those moments that join us together.  I agree with my Aunt that in this overstimulated fast-paced world it's nice to have these kinds of connections to make us stop a moment and reflect on the various ways that our food comes into our lives. I also love how so many recipes, when shared, keep the name of the person who gifted them to us.

This evening my congregation will be hosting a group of 32 members of a congregation in Maryland who are on a 10 day tour of Israel with their Rabbi. After many guided tours to historical sites they are looking forward to sitting and talking with folks who live here. I have been asked to contribute my three bean salad to the meal.   I am always glad to make and share it.  While assembling the ingredients I stopped to think about it's entry into our lives. 

Nowadays, three bean salad is well known all over the US and multiple variations are on the web. But while living in Houston (in the late 1960s), my husband and I made sure that each of us would have some private time each week, with each of our children.  On one such outing I went with our son Daniel to attend an outdoor performance of an abridged version of some Gilbert and Sullivan operetta out on a lawn of The University of Houston. I think that it was the Pirates of Penzance, but am not sure. 

I did not recognize anyone sitting near us in the audience but Daniel soon picked up a conversation with a boy near his age. I introduced myself to his mother and learned that they were in Houston for the summer while her husband, a school teacher, took summer classes at U of H, in order to eventually qualify to become a school principal in their home town somewhere I think in Arkansas or Alabama. He was often busy attending those summer program classes or working in the university library on his homework, so she and their son were exploring Houston on their own. 

I invited them to join our family picnic the next week in Herman Park on the 4th of July--speeches, fire works and all. They were glad to accept and she brought three bean salad that she'd made. We'd never tasted one before. We all enjoyed it so I asked for her recipe. She wrote out on a piece of paper which I copied on to a file card after I returned home. I added her name Eula Ross.  We got together only once or twice more during that summer, but three bean salad became a staple in our family's favorite summer recipes; particularly as a contribution to buffets and picnics.

Here in Israel the recipe has changed somewhat. I add diced fresh rosemary needles (that I pick fresh from the shrubs) to the chopped parsley in the original recipe and often use chickpeas for the third bean. 

Today I found that I needed to purchase more chickpeas so used red beans as I have no red onion and wanted to add color other than the chopped sweet red pepper to the salad.  I use less sugar in the dressing that Eula Ross recommended and the minimum quantity of oil.  But each time I prepare this dish, whether or not I check the details on the old file card or fly free with improvisations, I think a special thanks to Eula Ross where ever she is now. 

I am sharing this story with you because in this day and age of instant communication, information from people whom one never meets, an entire rainbow of recipes for any dish for which one could possible conceive of hankering, this older, slower, deeper time of meeting a stranger who became an acquaintance and shared her recipe and it's evolution to fit my current location and dietary preferences, pleases me a great deal.

Eula Ross' Three Bean Salad

Ingredients
  

  • 2 cups each green string beans, yellow string beans, red beans or pinto beans
  • 2 stalks of celery cut into cubed shape pieces
  • 1/2 red union diced
  • 1 cup chopped fresh parsley
  • 1/2 cup chopped bell peppers
  • 1/2 cup vinegar
  • 1/3 cup sugar
  • 1/4 to 1/2 cup oil
  • 1 1/2 teaspoons salt
  • 1/4 teaspoon fresh ground black pepper

Instructions
 

  • Whisk the five dressing ingredients together and pour over the vegetables.
  • Mix together cover and chill in fridge.
  • Keeps for 10 days

Notes

Aunt Haya's changes: 
  • 1 Tablespoon of chopped fresh rosemary to the parsley
  • I used frozen cut yellow and green beans which I steam over boiling water just until they thaw, so that they are still a bit crisp
  • I sometimes substitute chick peas for the red or pinto beans – I soak which ever of the three that I use overnight, then cook them myself, drain them before adding to the salad. (I find commercial canned beans of all three types, over cooked (too soft) and too salty)
  • I use only 1 teaspoon of salt
  • About 1/3 cup of oil
  • Reduce the amount of sugar
  • I like to use apple cider vinegar

Make Do Bullet Blender

Recently I was wasting time researching ideas for food preparations on Pinterest and came across a posting that mentioned using regular mouth canning jars as a personal bullet blender device.  According to the pin/link that mentioned it the mouth of a regular pint jar happens to fit the blender blade base which then fits into the blender and can be used to make personal smoothies.

I already own a blender and am not interested in buying another appliance for my kitchen.  But there are times when it would be great to be able to make individual smoothies without having to clean the blender in between each recipe.

This morning, after mulling it over for a bit, I decided to give it a try.  I figured the worst thing that would happen is that it wouldn't work and I would have to dump it all into the blender and start from scratch.

To make this morning's smoothie I put the following ingredients into a regular mouth pint canning jar:  Greek style yogurt, organic strawberries, washed and quartered, fresh ground flax seed, greens powder, coconut oil, and a splash of almond milk to make sure there was enough liquid.  I put the blade base on the jar and it fit very well, placed the whole thing on the blender and hit the button.

I didn't measure very well as I wasn't sure how it would work but it seemed to have come out okay.   The hardest part was trying to carefully undo the jar and blade base from the without undoing the jar and spilling the contents all over the blender.

It turns out this works very well and I anticipate more personal smoothies in our future.

Bugs In Your Frappucino?

cochineal bugs | photo: Zyance

Starbucks has recently come under fire by vegetarians.  It turns out their strawberry flavored drinks have been changed.  They're using a new ingredient…cochineal extract.  That picture on the left is cochineal bugs.  They're used to make food coloring. Only pregnant females are used; their outer casings are crushed and  processed into food dye, producing a deep red color.

Also referred to as carmine, this  coloring agent has been known to cause severe allergies including urticaria and asthma.  There have also been reported cases of anaphylaxis.

Because it is made from bugs, it is considered a natural food substance and some companies use it in place of petro-chemically derived artificial colors.  Also because it is made from bugs, vegetarians do not eat cochineal.  And I believe this ingredient is considered non-kosher.   However it is appearing in a wider and wider range of foods including yogurts, ice cream, candies, and some beverages.  Cochineal is also finding it's way into cosmetics as a coloring agent.

While I know there are many cultures that eat bugs as part of their diet, they are high in protein, research has not shown that these other edible bugs carry the same allergic potential as the cochineal bug.  I also find it very irresponsible for Starbucks, which advertises that it can made vegetarian friendly drinks, would change it's ingredients without notifying it's consumers.  Even those who are not vegetarian may prefer not to ingest this substance.  And why cochineal in the first place?  There are fruit and vegetable based sources for red coloring such as beets or raspberries which could have been used instead.

Don't want to eat bugs?  Another good reason to read the label.

Joy Bauer’s Food Cures


Joy Bauer's Food Cures has been revised and updated; I was fortunate enough to have a copy recently come across my desk.

As those of you reading my blog know, I am a huge proponent of food and it's ability to help support a healthy body.  We are what we eat; eating whole food and practicing wholesome nutrition goes a long way toward supporting our bodies and in dealing with health issues.

Broken down into several easy to understand categories this book covers the basics of understanding nutrition as well as how to, as Joy puts it, “think like a nutritionist.”  She offers information about how to lose weight and support healthy skin and hair.

Speaking of hair, did you know the average person loses about 100 hairs each day?  It turns out that since hair is made from protein if we don't get enough we can actually cause the rate of new hair growth to slow down.  In the book Joy points out that hair is a good way to determine overall health and highlights which vitamins (and which foods contain those vitamins) are supportive for healthy hair and nails (which are made from the same hardened keratin protein as hair).  Offering more in-depth health and nutrition support, the book also delves into conditions such as cardiovascular disease, diabetes, migraines, IBS and more.

The book is easy-to-read and laid out with step-by-step encouragement and support to help the reader reach their goals for health.  The book is also sprinkled with lots of call-out boxes which cover the highlights and answer questions that the reader may have.  She includes stories and examples throughout the book which is helpful.  In addition to providing the necessary information to help the reader better understand the basics of their condition and how to best support their body each chapter has a 4-Step Program which reminds the reader of the basics, provides a grocery list, offers some additional suggestions, and then also offers meal plans with some delicious looking recipes.  Her Citrus Smooth-See recipe on page 272 is delicious as is the Vegetable Oatmeal Bisque on page 322.  And the Parmesan Couscous and Ratatouille with Olives, Tomatoes and Fresh Basil on pages 383 (listed below) is a new family favorite.

Joy Bauer's Food Cures provides what you need to know about healthy eating and whole food nutrition.  It also gives you information to help you understand how to make those healthy changes.

Parmesan Couscous and Ratatouille With Olives, Tomatoes, and Fresh Basil
Makes 3 servings (1 1/2 cups ratatouille and 1 1/2 cups coucous per serving

Ratatouille

1/2 pound kale, stems trimmed, thinly sliced
Kosher salt
1 tablespoon olive oil
1 large yellow squash, cut into small cubes (about 2 cups)
2 medium tomatoes, diced
1/4 cups kalamata or nicoise olives (7 or 8) pitted and chopped
Pinch of ground red papper
1/4 cup whole basil leaves torn

Couscous

1 cup whole wheat couscous
1 cup sugar snap peas, chopped
1 1/4 cups low sodium chicken or vegetable broth, heated
1/2 cup grated Parmesan cheese
Kosher salt
Ground black pepper

To make the ratatouille:
Heat a deep saute pan over high heat
Add the kale, a sprinkle of salt, and 3/4 cup water
Cook, stirring occasionally for 13-15 minutes or until softened
If the kale becomes too dry add more water
Stir in the oil, squash, tomatoes, olives, and red pepper
Cook for 5-6 minutes or until the squash is tender and the tomatoes lose their shape
Remove from the heat and stir in the basil
Set aside

To make the couscous:
In a medium bowl, mix the couscous and sugar snap peas
Pour the hot broth on top, stir at once and cover with aluminum foil
Allow the couscous to rest for 5-6 minutes or until all the water is absorbed and the couscous is soft and fluffy
Fold the cheese into the couscous and season with salt and black pepper

To serve:
Spoon the couscous onto a plate or bowl and serve the ratatouille on top

To learn more about Joy and the concept of food cures visit her website.

Disclosure: cmp.ly/1cmp.ly/5

Curried Cauliflower

Health Benefits of Cauliflower


A delicious cruciferous vegetable, cauliflower is high in vitamin C, vitamin K, folate, and pantothenic acid. High in fiber, some studies indicate that it's a good choice for cardiovascular health due to its ability to bind bile acids and help regulate cholesterol levels. In addition to cardiovascular support, cauliflower is also good for the detoxification, digestive, immune, and inflammatory systems in the body. 

In my part of the world, cauliflower is in season.  I'm very fortunate to live in an area where we have an extended growing season.  While I miss certain crops that need cold weather to grow well (like rhubarb) I love the veggies that come out of my garden.


Eat it All!


Cauliflower is a fabulous white vegetable. Sometimes it comes in an orange-y yellow color or even purple. Those have a few more antioxidants, but they're all still cauliflower and absolutely delicious steamed, baked, roasted, or even be eaten raw.

The tastiness doesn't stop with the florets.  Easy and versatile to prepare in a number of different ways, one of the things that always seems to surprise people is that you can use the cauliflower green leafy bits too.  They make a great vegetable to go along with your cooked cauliflower.

In the summer I often roast the greens right along with the florets.  Drizzled with fruity olive oil, some sea salt, and fresh ground pepper they are truly fabulous. A friend of mine recently told me that he used the greens in place of kale to make cauliflower greens chips and they were delicious.  

Now that we're heading into colder weather I'm not eating raw or steamed vegetables as much, preferring different cooking methods.  At this time of year with cauliflower, I often like to curry it.  The flavors of curry go well with the cauliflower and greens.  Over a bed of rice with some protein on the side it's a very satisfying dinner.

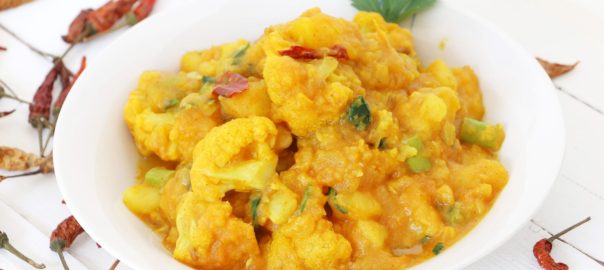
Curried Cauliflower

A delicious, warming way to serve this versatile vegetable

Ingredients
  

  • 1 generous pinch mustard seed
  • 2 Tbsp olive oil cold pressed, extra virgin, organic preferred
  • 1 onion, minced
  • 1 clove garlic, minced
  • 1 head cauliflower, cut into florets
  • 1 cauliflower greens, cut into bite-sized pieces
  • 1 tsp curry powder
  • 1/4 cup water
  • salt to taste
  • 1/4 cup cilantro, chopped fine

Instructions
 

  • Heat olive oil in the pan
  • Add mustard seeds and cook until they just start to pop
  • Turn heat to medium
  • Add onions and saute until starting to soften
  • Add garlic and saute one minute more
  • Add curry powder and stir well
  • Add cauliflower, greens, and water
  • Reduce heat to low, cover and cook 8-10 minutes until cauliflower is tender
  • Season with salt and cilantro

Gluten Free Lemon Muffins

I needed to make something to bring to an event that I was attending recently. Knowing that the hostess was sensitive to gluten and dairy I wanted to make sure that I made something that fit her nutritional plan.

Casting around for ideas I spied a pile of fresh Meyer lemons that I had recently been gifted with in the fruit bowl.  These are my absolute favorite lemons. Immensely fragrant they add fabulous lemon-y flavor. I have a small tree that is now making 6-8 lemons a year.  I am eagerly awaiting the day that I get bags full of lemons like my friends.  Fortunately, those same friends are very generous and share.

I had thought about making a lemon quick bread but decided to make muffins instead. The best thing about muffins is that they are so easy to throw together. In just a few minutes you can have all of the ingredients mixed together and into the pan.  Because muffins are so small they bake rather quickly. 

I love lemon-flavored baked goods. Quick breads, scones, muffins, they are all so tasty when they have the added brightness of lemon added to them.  I'm not sure why lemon baked goods don't often make an appearance, more people seem to go for chocolate, or other flavors.  Sometimes sticking with a simple flavor is the best, imho.

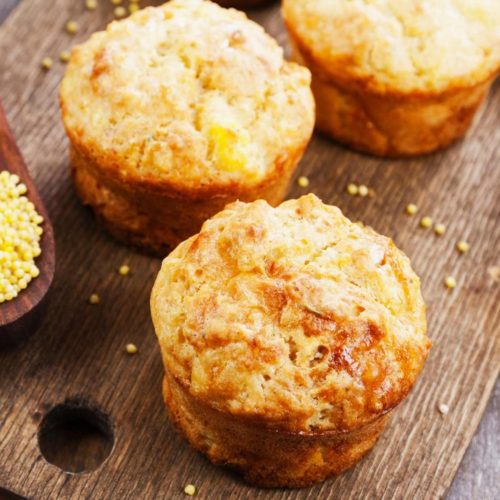
I wanted my muffins to have a little crunch to them so I decided to add some millet which would give a slight pop.  I've used millet before in other baked goods and like the crunch and texture it adds.  

I often play with a recipe multiple times before it's ready for prime time, but this one seemed to come together really well so I'm sharing it as is.  I made it in mini-muffin tins and got three dozen.  They were well received at the event, all of them were eaten and I went home with crumbs.  This is definitely a recipe that's a keeper.  Something not-too-sweet but definitely tasty, perfect with a cup of tea to brighten up a cold, grey, winter morning.

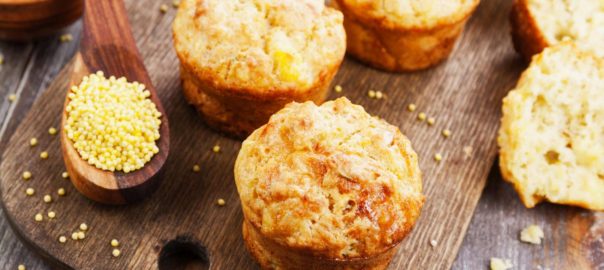
Lemon Millet Muffins

Ingredients
  

  • 1/2 cup coconut oil
  • 1 cup sucanat
  • 1/2 cup evaporated cane juice crystals
  • 1 lemon
  • 2 eggs
  • 1/2 cup almond milk, approximately
  • 1 cup gluten free flour mix (I used a combination of oat, rice, buckwheat, tapioca)
  • 1/4 cup fresh ground flax seeds
  • 1/4 cup (heaping) millet seeds
  • 1 teaspoon baking soda
  • 1/2 teaspoon sea salt

Instructions
 

  • Preheat oven to 350 F
  • Grease three mini-muffin pans (or one regular muffin pan)
  • Zest the lemon
  • Juice the lemon and put juice into a measuring cup
  • Add almond milk until there is 2/3 cup liquid
  • Beat together coconut oil and sugars until fully combined
  • Add eggs, one at a time until well mixed
  • Add lemon zest, baking soda, and the salt
  • Alternate adding flour and curdled milk, making sure they are well mixed
  • Spoon by tablespoonfuls into muffin cups
  • Bake 15 minutes
  • Let cool 2 minutes in the pan
  • Finish cooling on a wire rack

Pressure Cooker Curried Rice and Beans

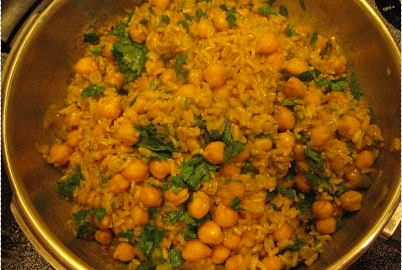
Pressure Cooker Curried Chickpeas And Rice

Afraid of the pressure cooker

I have a confession to make.  I've always been a little afraid of pressure cookers.  When I was growing up my mother didn't use one.  By the time I was exposed to them as a young adult, the concept seemed a little scary.

When I talked to my mother about it she told me that her mother had used a pressure cooker when she was growing up.  So I asked my mother why she never used one.  She replied by sharing a story about my Nana, my father's mother, involving a pressure cooker.  

Apparently, in the middle of cooking dinner with the pressure cooker, something went horribly wrong. There was some kind of an explosion and the lid blew off.  There was so much force involved that the lid embedded itself in the ceiling of Nana's kitchen.  

One can only imagine the horror and disbelief … and what the kitchen must have looked like.  Mom wasn't exactly sure how Nana managed to get the lid out of the ceiling.  That was the end of pressure cooking as far as Nana was concerned. Needless to say that episode was enough to convince my mother that she did not want to use a pressure cooker.  Ever.

Learning to use a pressure cooker

 Not having grown up around one neither did I.  Until now. Fast forward many years….my friend Emily at The Kindred Kitchen invited me over for dinner.  She made an amazing dinner in her pressure cooker.  She was so confident, so calm, and it was all so delicious!  I was hooked and wound up buying one of my own.

I've been experimenting with it and have discovered that I absolutely love it; it is rapidly becoming one of my favorite kitchen appliances.  Meats and vegetables are delicious, colorful, flavorful, and oh so tender.  The real prize-winning use, however, is for rice and beans, of all different flavor profiles.  It is so quick, so easy, and it comes out just right.  I absolutely love my pressure cooker and owe Emily a debt of gratitude for helping me to change my mind.  This recipe for curried chickpeas and rice is based on one that she shared with me.

Pressure Cooker Curried Rice and Beans
Print
Ingredients
  1. 1 cup chickpeas, picked over and rinsed
  2. 1 cup brown rice
  3. 1 medium onion, diced
  4. 2 cloves garlic, minced
  5. 2 tablespoons curry powder
  6. 2 cups vegetable broth
  7. sea salt and fresh ground pepper to taste
  8. 1/2 cup chopped cilantro
Instructions
  1. In the morning set the chickpeas to soak in a pot of hot water
In the evening assemble your meal
  1. Drain and rinse the chickpeas
  2. Heat the olive oil in the pressure cooker
  3. Saute the onions and garlic for a few minutes until soft
  4. Add the curry powder and stir for a moment
  5. Add the rice and stir until the rice is coated
  6. Add the broth, chickpeas, salt and pepper
  7. Lock the lid in place and bring to high pressure
  8. Reduce the heat but still maintain high pressure
  9. Cook for 9 minutes and remove from heat
  10. Let pressure drop naturally for another 5 minutes
  11. Quick release and then remove the lid
  12. Stir in the chopped cilantro and serve
The Ingredient Guru, Mira Dessy https://theingredientguru.com/

New and improved pressure cooking

Fast forward again. After I became comfortable with using a pressure cooker a lovely new device came on the market.  The Instant Pot! I love my instant pot and it's pressure cooking capabilities. This dish works just as well in the instant pot and only needs a few modifications.

Instant Pot Curried Chickpeas and Rice
Print
Ingredients
  1. 1 cup chickpeas, picked over and rinsed
  2. 3 cups of water
  3. 1 cup brown rice
  4. 1 medium onion, diced
  5. 2 cloves garlic, minced
  6. 2 tablespoons curry powder
  7. 2 cups vegetable broth
  8. sea salt and fresh ground pepper to taste
  9. 1/2 cup chopped cilantro
Instructions
  1. Add chickpeas and 3 cups of water to IP
  2. Cook for 2 minutes
  3. Natural release for 10 minutes, then quick release
  4. Rinse well and set aside
  5. Heat the olive oil in the IP
  6. Saute the onions and garlic for a few minutes until soft
  7. Add the curry powder and stir for a moment
  8. Add the rice and stir until the rice is coated
  9. Add the broth, chickpeas, salt and pepper
  10. Lock the lid in place and bring to high pressure for 25 minutes
  11. Natural release for 15 minutes, then quick release
  12. Stir in the chopped cilantro and serve
The Ingredient Guru, Mira Dessy https://theingredientguru.com/

If you enjoyed this article, please join my community to receive more information and special offers with my free newsletter, Food News You Can Use  (I do the research so you don't have to). This concise, informative newsletter gives you updates you need to know about the ingredients for living a healthy life.

Persimmon Raisin Muffins

It's persimmon season!  I love these tasty little fruits, with their rich fragrant scent and amazing flavor. Luckily for me, there is a pick your own place not too far away.  Each year I go and pick pounds and pounds of them.  I eat as many as I can before they get so ripe and so soft that they are in danger of sliding out of the fruit bowl and off the counter.  They have to be pretty soft before they are ripe enough to eat so this window is pretty small.

When I get to this point I turn the rest into pulp to store in the freezer.  This allows me to make cakes, cookies, and other persimmon delights for as long as the supply lasts. Apparently you can make jam from persimmons but I somehow never seem to get around to doing that.  I'm also not sure if I would use it as I'm currently the only one in the house who likes persimmons.

One of my favorite things to bake with persimmons are these muffins.  They're a great treat with a rich dark flavor that is so reminiscent of the crisp fall weather.  I'm sure they would freeze well but somehow they've never lasted long enough for me to test that theory.

Persimmon Raisin Muffins

Ingredients
  

  • 3 cups white whole wheat flour
  • 1 teaspoon cinnamon
  • 1/2 teaspoon nutmeg
  • 1 teaspoon baking soda
  • ½ teaspoon baking powder
  • 1 teaspoon sea salt
  • 1 cup persimmon pulp
  • 1 egg
  • 1 cup sucanat
  • 1 tablespoon vanilla
  • 1 cup raisins
  • 1 cup chopped pecans

Instructions
 

  • Preheat oven to 375°F
  • Grease loaf pans
  • Sift together flour, cinnamon, nutmeg, baking soda, baking powder and salt
  • In a separate bowl beat egg, add persimmon pulp and sucanat
  • Add vanilla, raisins and pecans
  • Add sifted ingredients and mix well
  • Spoon into greased muffin tins
  • Bake 15 minutes or until tops spring back when tapped
  • Remove from oven and cool in tins 3-4 minutes before moving to wire rack
  • Finish cooling on wire rack